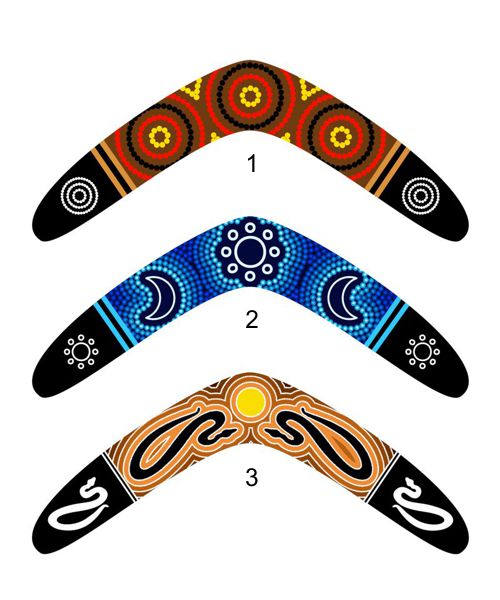
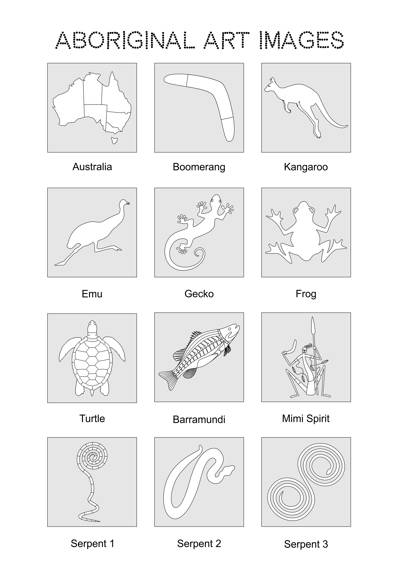
Aboriginal Art Lesson - Boomerang Designs
In this lesson we use what we have learned about Aboriginal art to create our own designs for decorative boomerangs.
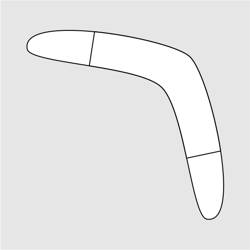
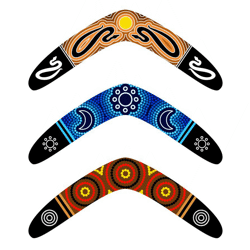
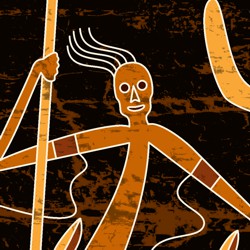
The boomerang is an aerodynamic stick that was designed by Aboriginal people to be used as a weapon for hunting. It is shaped like two connected wings whose aerofoil design forces it to travel in a curve and return to the thrower. Boomerangs are also used for sport and ceremonial purposes. Today the boomerang is an Australian icon, and many are sold as indigenous artworks decorated with Aboriginal paintings and carvings.
-
In this lesson we use what we have learned about indigenous symbols, Dreaming stories and different styles of Aboriginal art to create our own designs for decorative boomerangs.
-
Once you understand how our designs are developed, you can use them as a model that you can adapt with other images, symbols and colors to create your own ideas.
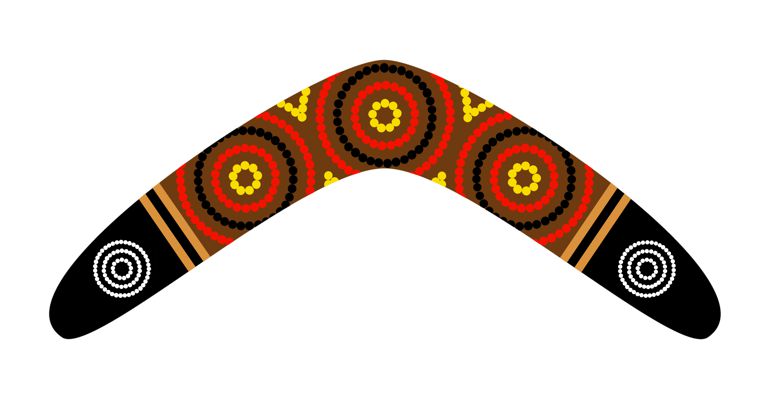
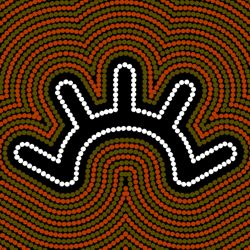
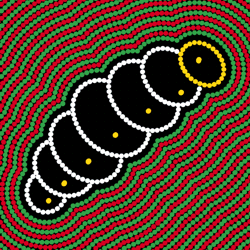
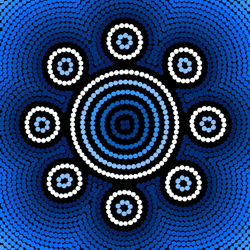
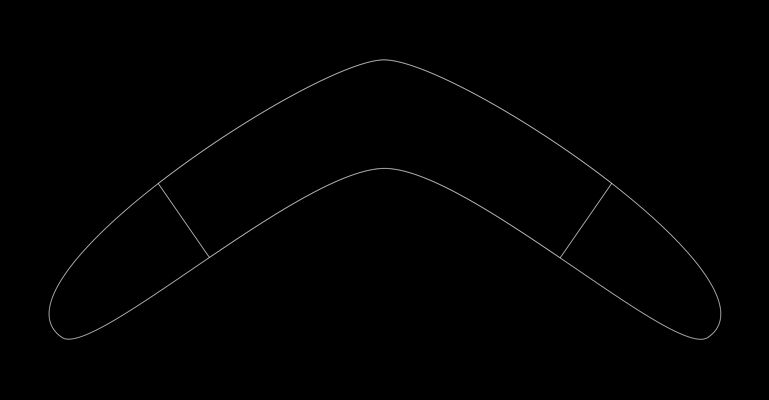
The Components for Aboriginal Boomerang Design 1

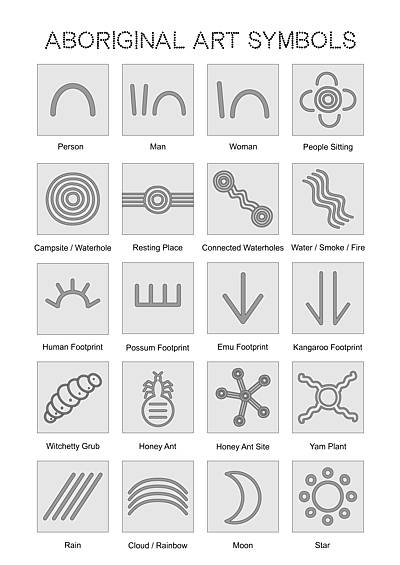
To create our first design we have used the image of a boomerang from our sheet of Aboriginal Art Images along with the symbol for a campsite from our sheet of Aboriginal Art Symbols.
Step by Step Development of Aboriginal Boomerang Design 1

- Slide Show
- aboriginal-boomerang-design-3
Aboriginal Boomerang Design 1
- aboriginal-boomerang-design-3a
1. The outline of a boomerang is drawn with a white color pencil on a black sheet of card.
- aboriginal-boomerang-design-3b
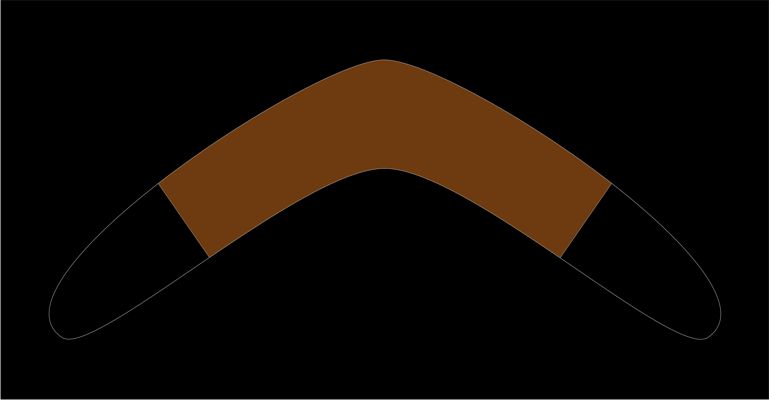
2. The central section of the boomerang is painted a brown ochre leaving the hand grips black.
- aboriginal-boomerang-design-3c
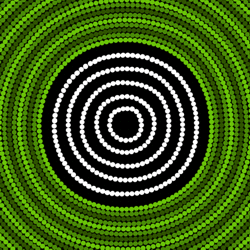
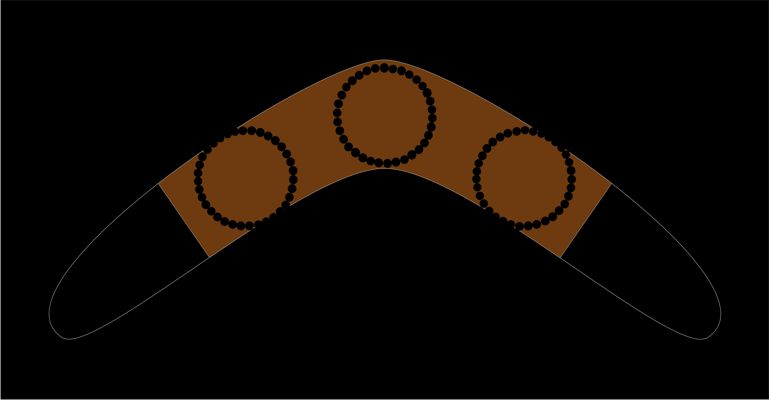
3. Three equal circles in the central section are painted with black dots to form a symmetrical design.
- aboriginal-boomerang-design-3d
4. Concentric rings of red dots are painted both inside and outside the black dot rings.
- aboriginal-boomerang-design-3e
5. Concentric rings of yellow dots are painted both inside and outside the red dot rings.
- aboriginal-boomerang-design-3f
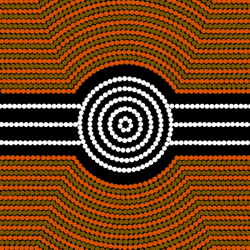
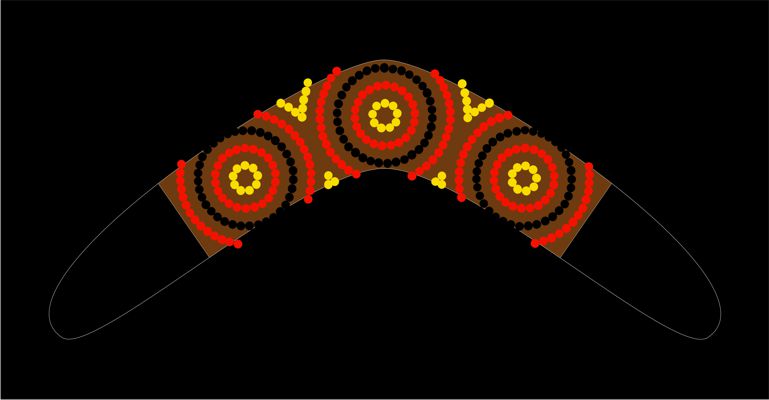
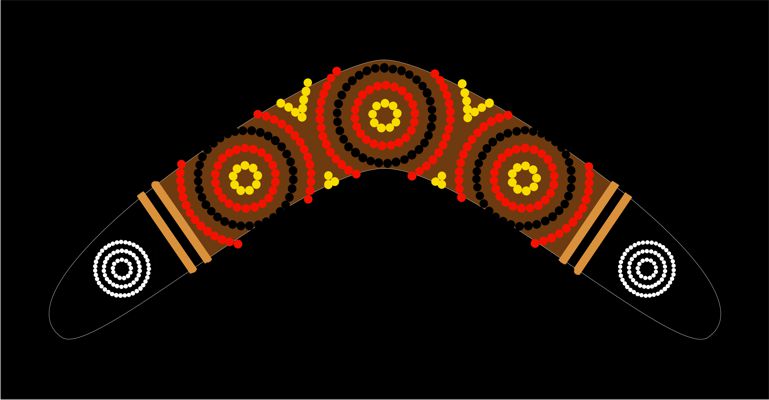
6. The concentric rings of a campsite symbol are painted with white dots on the black grips.
- aboriginal-boomerang-design-3g
7. The ends of the grips are painted with two stripes of light ochre.
- aboriginal-boomerang-design-3
8. The boomerang is carefully cut out and framed it on a white sheet of card.
(Click on the play buttons or swipe back and forward to explore each stage of our design.)
The step by step stages of the design:
-
The outline of a boomerang is drawn with a white color pencil on a black sheet of card.
-
The central section of the boomerang is painted a brown ochre leaving the hand grips black.
-
Three equal circles in the central section are painted with black dots to form a symmetrical design.
-
Concentric rings of red dots are painted both inside and outside the black dot rings.
-
Concentric rings of yellow dots are painted both inside and outside the red dot rings.
-
The concentric rings of a campsite symbol are painted with white dots on the black grips.
-
The ends of the grips are painted with two stripes of light ochre.
-
The boomerang is carefully cut out and framed it on a white sheet of card.
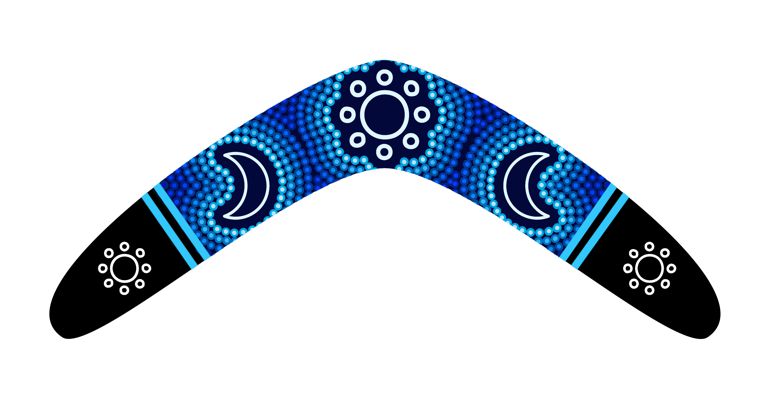
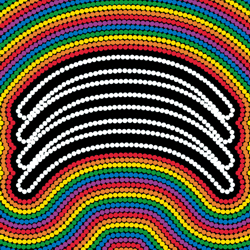
The Components for Aboriginal Boomerang Design 2

To create our second design we have used the image of a boomerang from our sheet of Aboriginal Art Images along with the symbols for a star and a moon from our sheet of Aboriginal Art Symbols.
Step by Step Development of Aboriginal Boomerang Design 2
- Slide Show
- aboriginal-boomerang-design-1
Aboriginal Boomerang Design 2
- aboriginal-boomerang-design-1a
1. The outline of a boomerang is drawn with a white color pencil on a black sheet of card.
- aboriginal-boomerang-design-1b
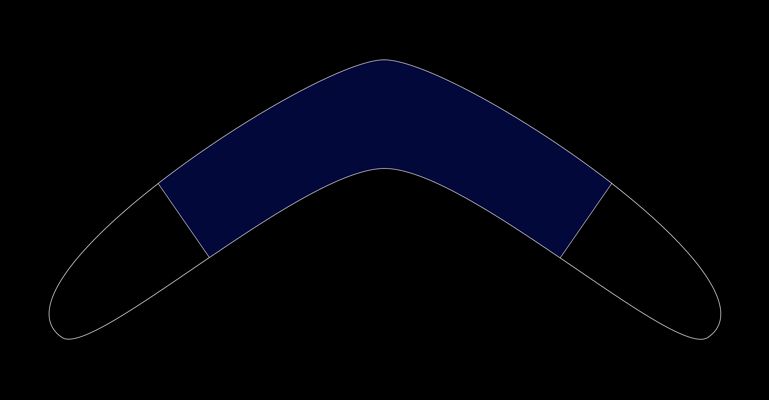
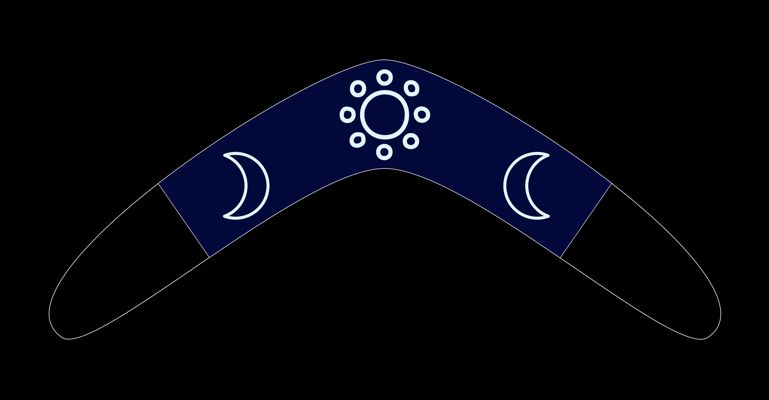
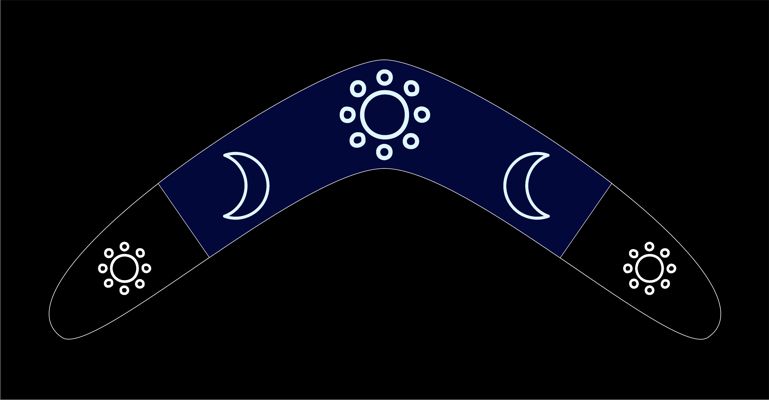
2. The central section of the boomerang is painted a dark blue leaving the hand grips black.
- aboriginal-boomerang-design-1c
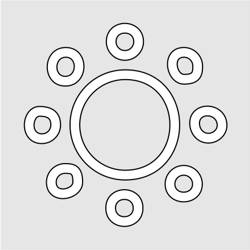
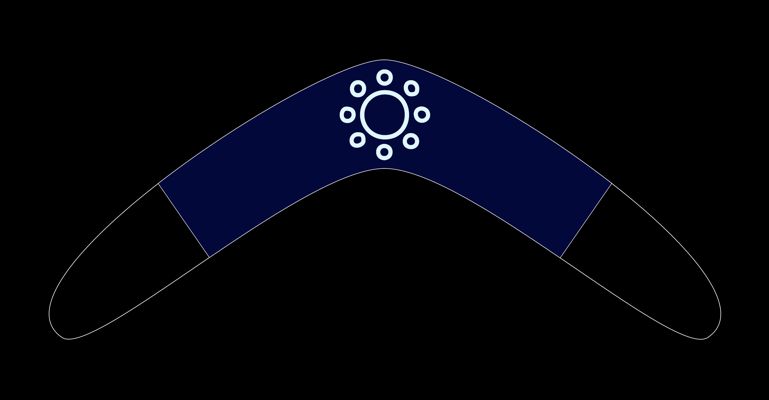
3. An Aboriginal star symbol is painted in white in the centre of the boomerang.
- aboriginal-boomerang-design-1d
4. The Aboriginal symbol for a moon is painted in white at either side of the central section.
- aboriginal-boomerang-design-1e
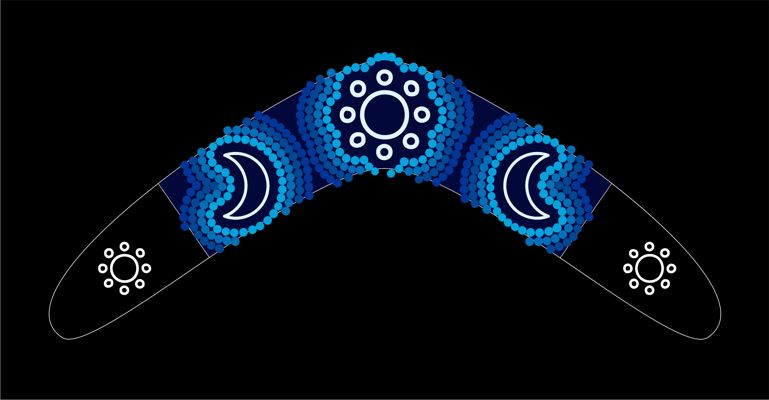
5. Smaller Aboriginal symbols of a star are painted with white on the black grips.
- aboriginal-boomerang-design-1f
6. The shapes of the central moons and star are echoed with a line of light blue dots.
- aboriginal-boomerang-design-1g
7. The shapes of the central moons and star continue to echo with progressively darker lines of blue dots.
- aboriginal-boomerang-design-1h
8. The pattern of blue dots is continued to fill the central section.
- aboriginal-boomerang-design-1i
9. A small bright blue dot is painted within each large dot to create a sparkle.
- aboriginal-boomerang-design-1j
10. The joins at the end of the grips are painted with two light blue stripes.
- aboriginal-boomerang-design-1
11.The boomerang is carefully cut out and framed on a white sheet of card.
(Click on the play buttons or swipe back and forward to explore each stage of our design.)
The step by step stages of the design:
-
The outline of a boomerang is drawn with a white color pencil on a black sheet of card.
-
The central section of the boomerang is painted a dark blue leaving the hand grips black.
-
An Aboriginal star symbol is painted in white in the centre of the boomerang.
-
The Aboriginal symbol for a moon is painted in white at either side of the central section.
-
Smaller Aboriginal symbols of a star are painted with white on the black grips.
-
The shapes of the central moons and star are echoed with a line of light blue dots.
-
The shapes of the central moons and star continue to echo with progressively darker lines of blue dots.
-
The pattern of blue dots is continued to fill the central section.
-
A small bright blue dot is painted within each large dot to create a sparkle.
-
The joins at the end of the grips are painted with two light blue stripes.
-
The boomerang is carefully cut out and framed on a white sheet of card.
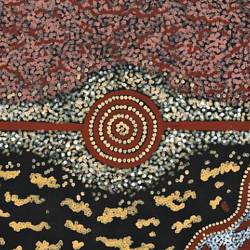
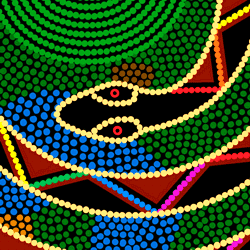
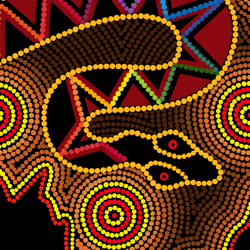
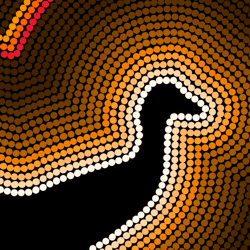
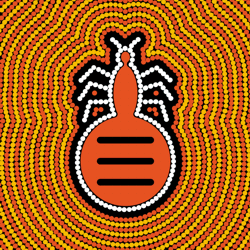
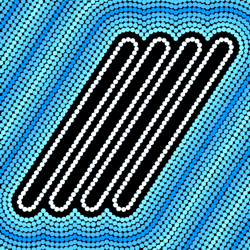
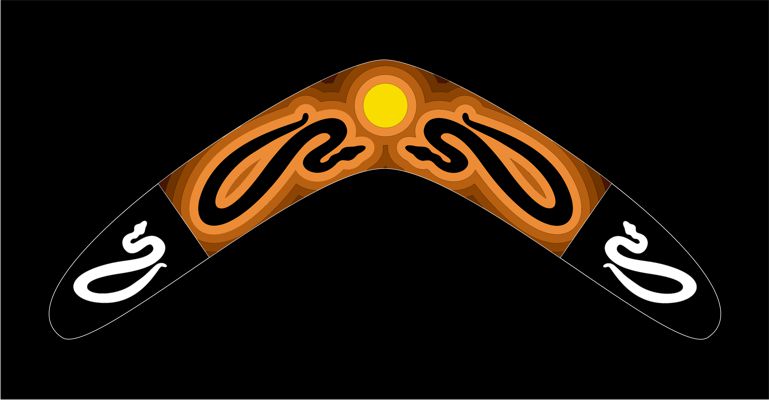
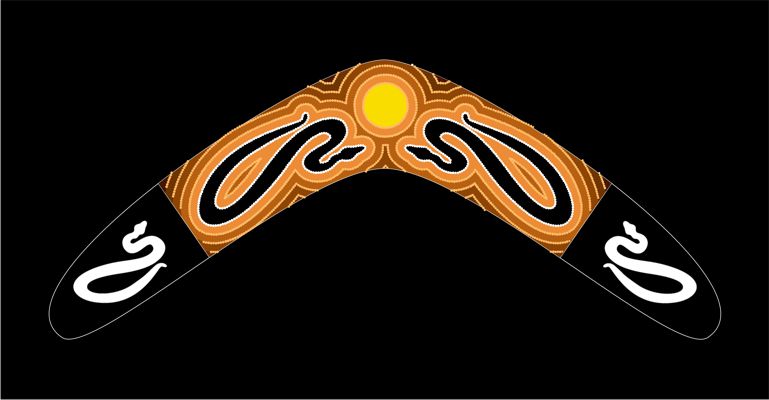
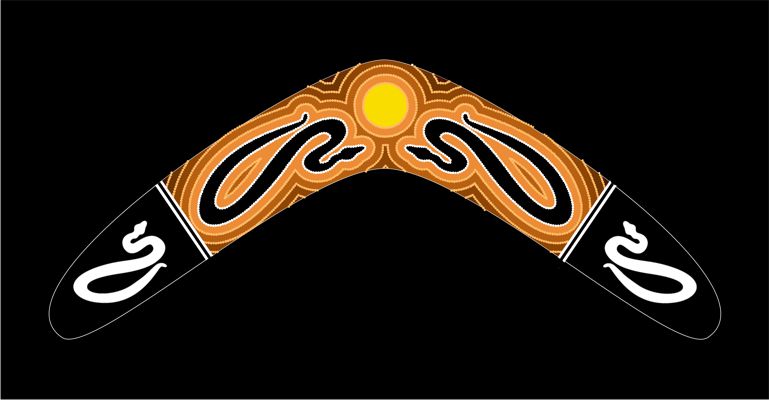
The Components for Aboriginal Boomerang Design 3
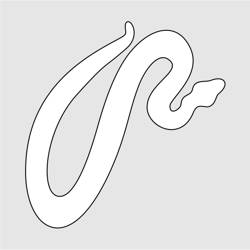

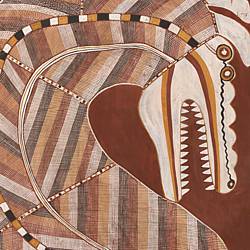
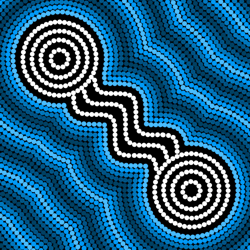
To create our third design we have used a boomerang and serpent from our sheet of Aboriginal Art Images along with a circular symbol to represent the sun.
Step by Step Development of Aboriginal Boomerang Design 3
- Slide Show
- aboriginal-boomerang-2
Aboriginal Boomerang Design 3
- aboriginal-boomerang-2a
1. The outline of a boomerang is drawn with a white color pencil on a black sheet of card.
- aboriginal-boomerang-2b
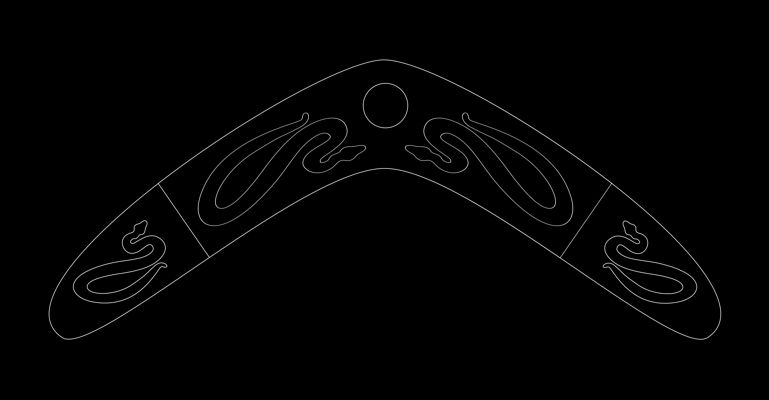
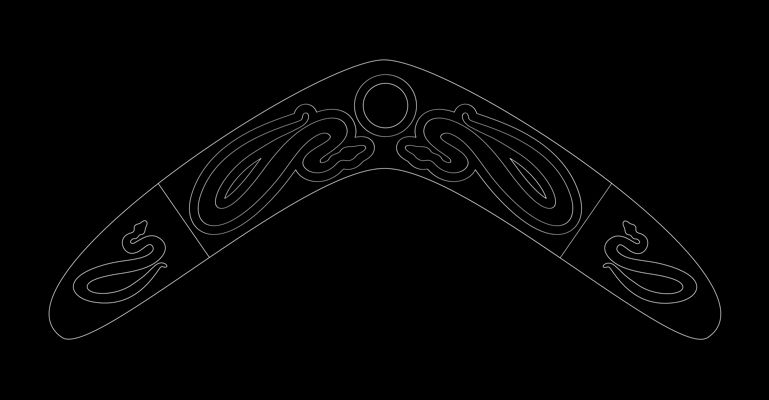
2. A sun symbol flanked by two symmetrical serpents is drawn to fill the central area.
- aboriginal-boomerang-2c
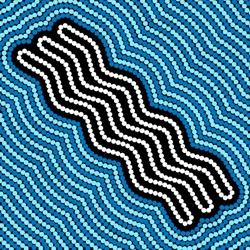
3. A smaller serpent is drawn on each grip to complete a symmetrical layout.
- aboriginal-boomerang-2d
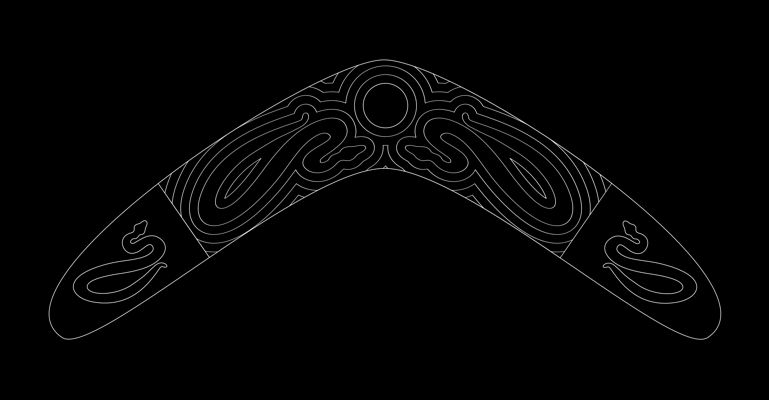
4. A border that echoes the shape of the snakes in the central section, is drawn in line.
- aboriginal-boomerang-2e
5. The border around the snakes is repeated to fill the central section.
- aboriginal-boomerang-2f
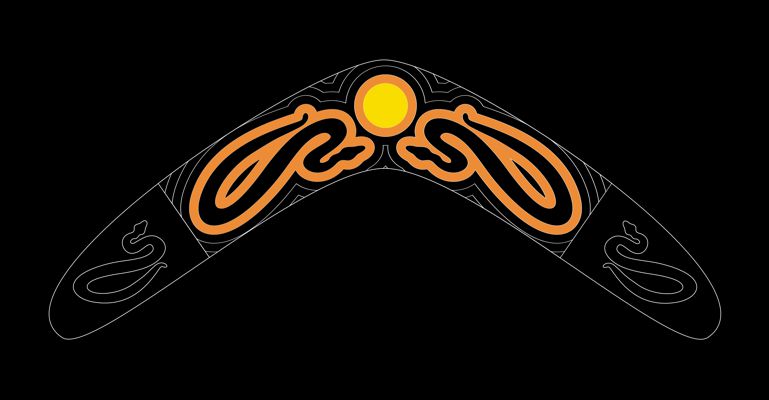
6. The sun is painted a bright symbolic yellow.
- aboriginal-boomerang-2g
7. The first border is painted a deeper yellow.
- aboriginal-boomerang-2h
8. The remaining borders are painted in progressively darker tones.
- aboriginal-boomerang-2i
9. The smaller serpents on each hand grip are painted white.
- aboriginal-boomerang-2j
10. The outlines of the central snakes are painted with white dots and the borders with yellow dots.
- aboriginal-boomerang-2k
11. The joins at the end of the grips are painted with two white stripes.
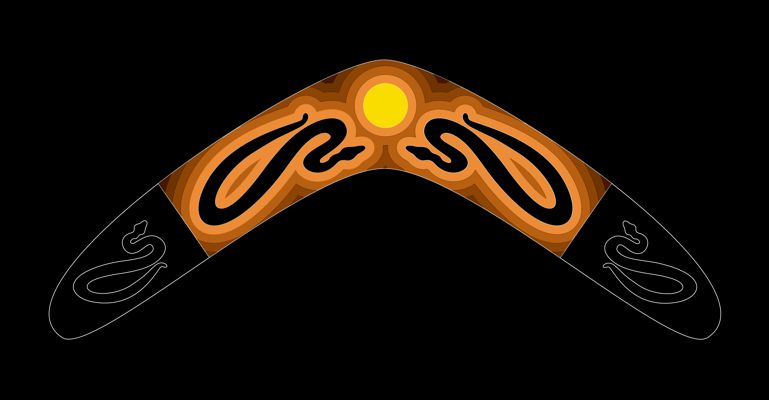
- aboriginal-boomerang-2
12. The boomerang is carefully cut out and framed on a white sheet of card.

(Click on the play buttons or swipe back and forward to explore each stage of our design.)
The step by step stages of the design:
-
The outline of a boomerang is drawn with a white color pencil on a black sheet of card.
-
A sun symbol flanked by two symmetrical serpents is drawn to fill the central area.
-
A smaller serpent is drawn on each grip to complete a symmetrical layout.
-
A border that echoes the shape of the snakes in the central section, is drawn in line.
-
The border around the snakes is repeated to fill the central section.
-
The sun is painted a bright symbolic yellow.
-
The first border is painted a deeper yellow.
-
The remaining borders are painted in progressively darker tones.
-
The smaller serpents on each hand grip are painted white.
-
The outlines of the central snakes are painted with white dots and the borders with yellow dots.
-
The joins at the end of the grips are painted with two white stripes.
-
The boomerang is carefully cut out and framed on a white sheet of card.


