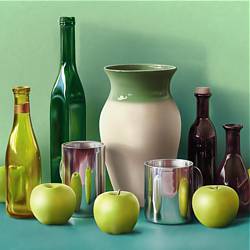
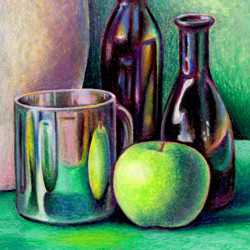
Still Life techniques - Painting Reflective Objects
This still life lesson illustrates a step by step technique for painting reflections on shiny objects
This step by step lesson explains and illustrates the technique used to paint the reflective objects in our Still Life Painting lesson. By following the illustrated stages below we lead you through the key points of their painting technique from the flat underpainting of their shapes to the gleaming reflections of the finished objects.
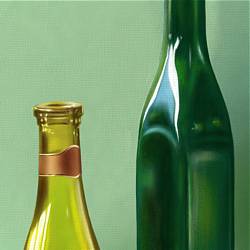
Step 1 - Paint the background first
As always, before you paint any still life object, it is best to paint its background first.
-
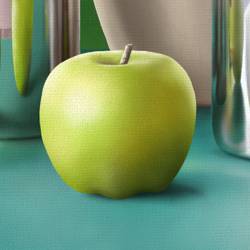
It is more practical to paint the objects in order from back to front, as it is technically easier to paint the edge of any object over the preceding one.
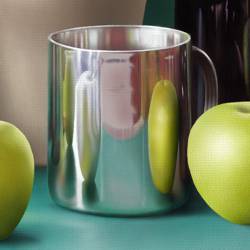
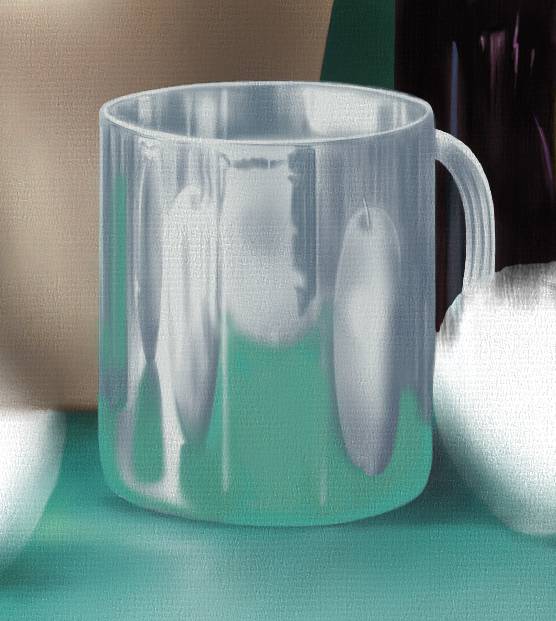
Step 2 - Underpaint the reflective cup
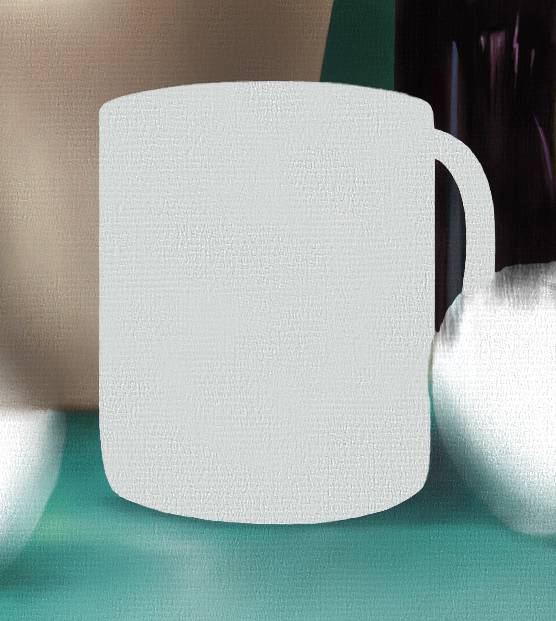
Underpaint the shape of the reflective cup with a flat area of neutral grey, taking care to establish its outline as accurately as possible.
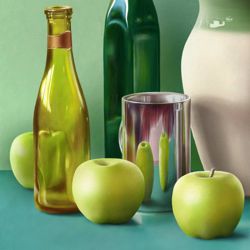
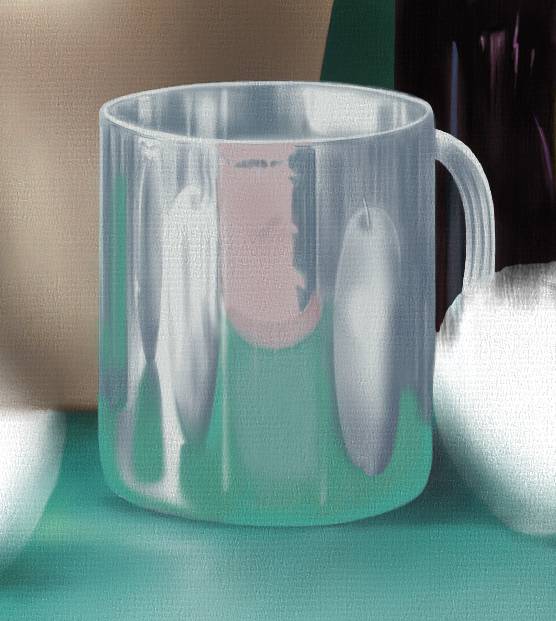
Step 3 - Paint in the reflected image
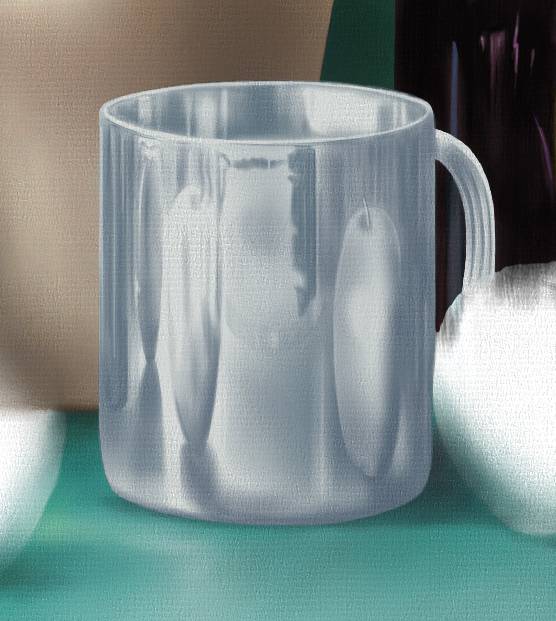
When you come to paint a reflective surface look upon it as a still life in miniature and approach it almost as a painting within a painting.
-
Apply a second layer of underpainting using a thin glaze of a darker grey to build up the shapes and tones of the distorted reflections. In essence you are painting a monochrome sketch on the surface of the cup.
-
Simply draw and trust the shapes and tones that you see and don't be too distracted by what the reflections represent.
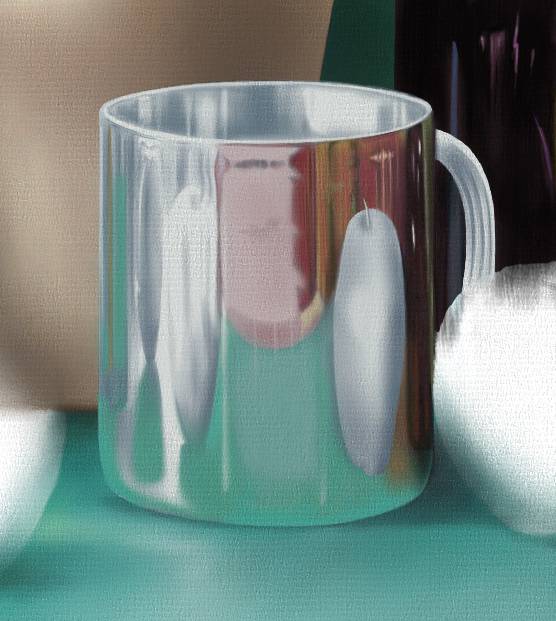
Step 4 - Start to color the background reflections
If we look at the reflections on the cup as a still life within a still life, the general rules about painting the background and foreground first still apply.
-
To begin we take the predominant color (turquoise-blue/green) which is a reflection of the foreground and build it up with several thin glazes.
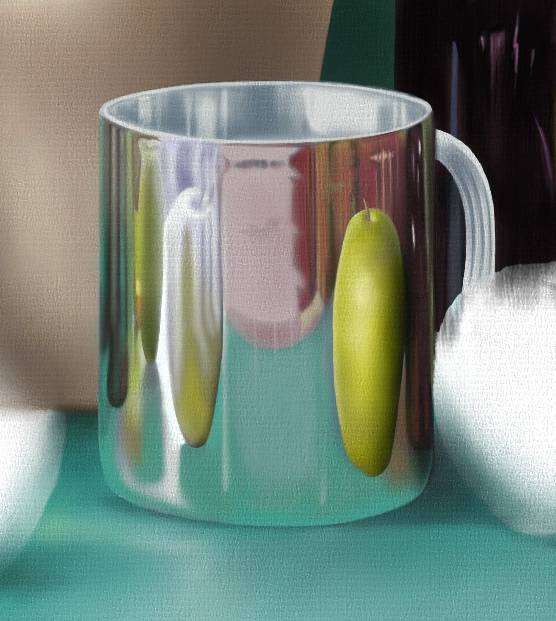
Step 5 - Build up the background reflections
We then take the next predominant background color which is a pinkish reflection of the floor and build it up with several thin glazes.
Step 6 - Complete the background reflections
Now we examine the background behind the reflected apple on the right and build up the deep warm colors and tones of that area.
Step 7 - Start to paint the reflected objects
Next we paint in the various distorted objects across the cup to complete the range of reflected colors.
Step 8 - Unify and balance the reflections
Once we have established the main colors of the cup, we unify and balance the reflected colors and tones by building up their depth of shading with a dark transparent glaze.
-
This increased contrast of tone helps to intensify the definition of the reflections as well as tying the cup to the foreground with a deep shadow.
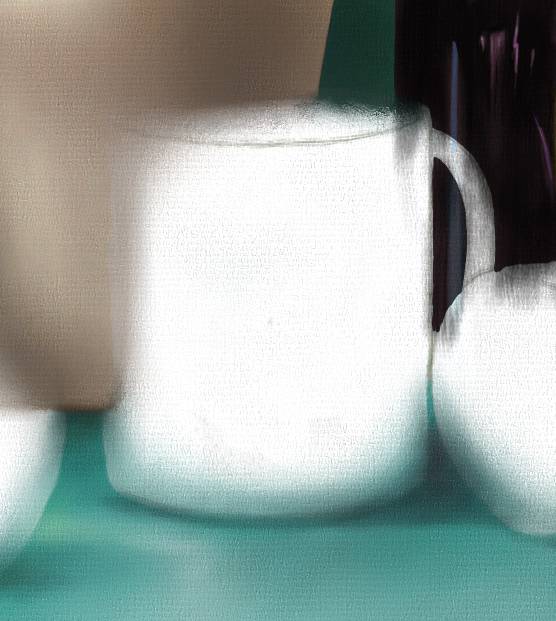
Step 9 - Paint the inside of the cup
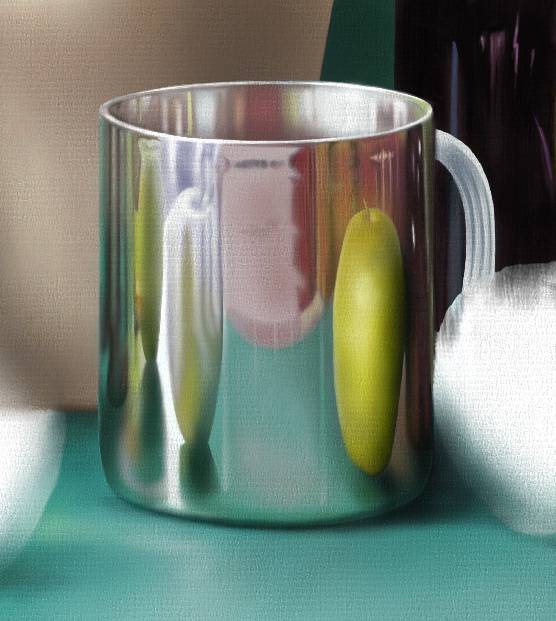
The penultimate stage is to paint the interior of the cup using the same process we used for the exterior.
-
What you should look out for are the variations in the sharpness and intensity of light around the rim of the cup where the interior and exterior unite.
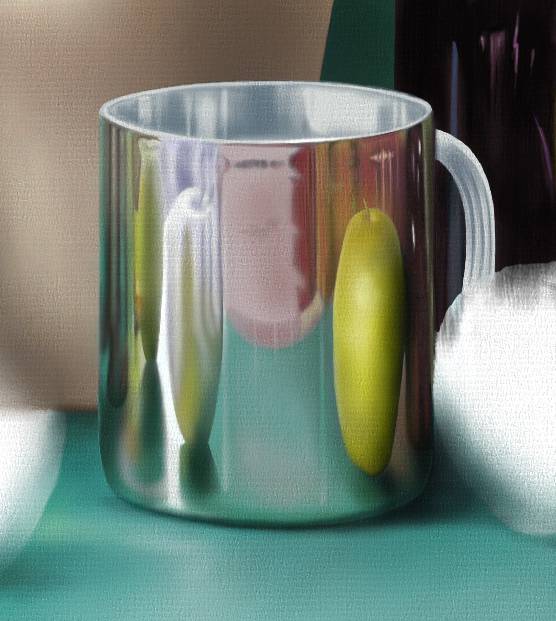
Step 10 - Build up the tones of the handle
The final stage in painting our reflective cup is to build up the tone and color of the handle.
-
Note the high level of contrast in the handle as its color and tone merge imperceptibly with the background, while the highlight on its rim forms the strongest tonal contrast on the cup.
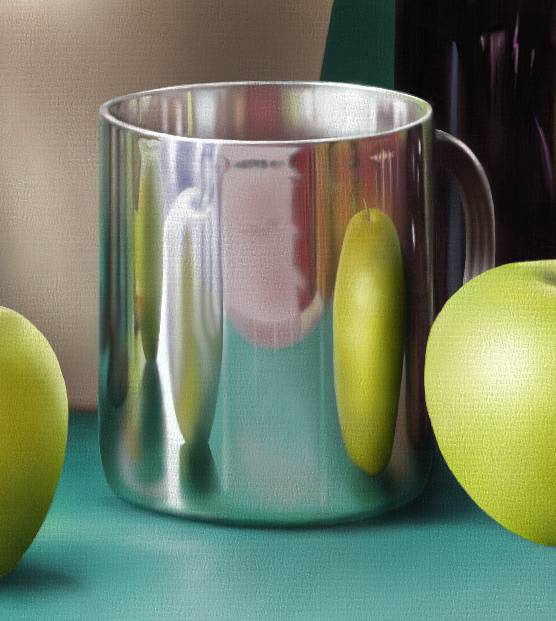
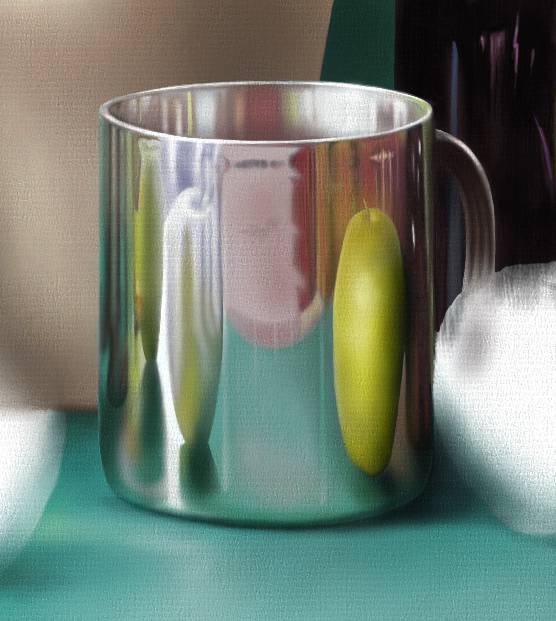
Step 11 - The completed reflections in context
When you see the reflections on our metallic cup in context, their distorted shapes and dramatic tones mirror the surrounding objects to make sense of its shining form.