Color Pencil Portraits - How to Shade the Skin
This step by step lesson teaches you how to shade the skin with layers of color pencil to form the glowing complexion of the face.
The soft shading and subtle coloring of the skin tone is gradually built up in layers to form the glowing complexion of the face.
Shading the Skin - Step 1
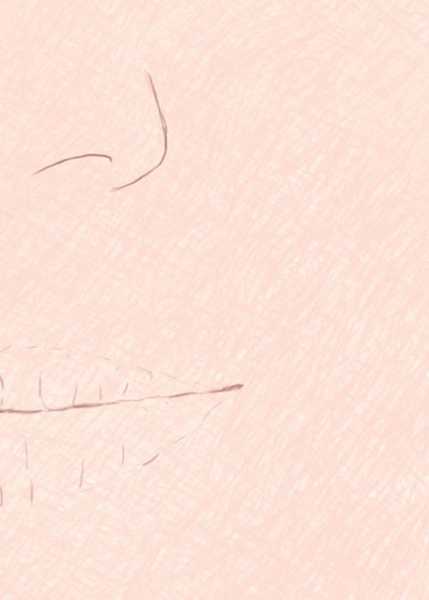
Click on the flip icon for close-up detail
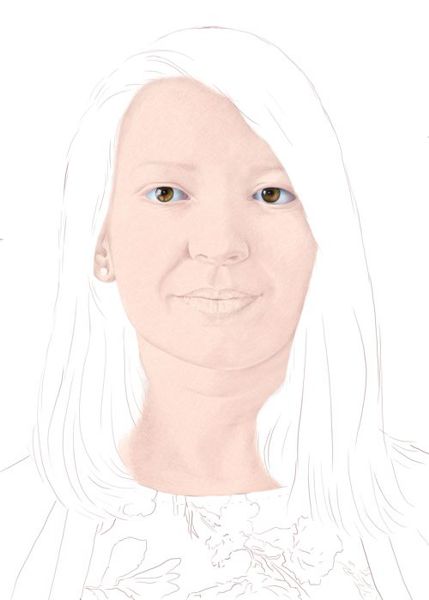
We begin to color the skin by shading the face and neck with a light flesh color.
-
This should be applied as flatly and evenly as possible.
-
As color pencil pigments are transparent, you should still be able to see the lines of your drawing shining through. If you feel that they are too weak you can always go over them again.
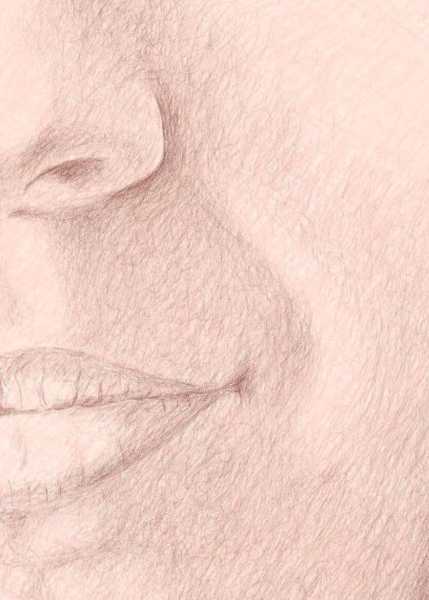
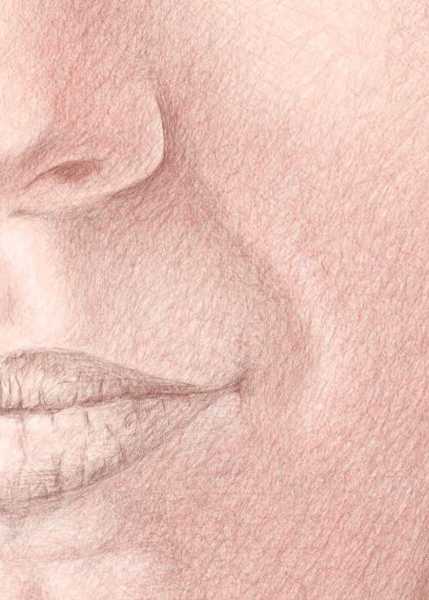
Close-up Detail
-
Our close-up detail illustrates the technique we used to shade the basic skin color.
-
You can see that we have used a blend of cross-hatching (in order to achieve a flat even cover) with some controlled scribbling (in order to fill in any white gaps and create a unified surface).
Shading the Skin - Step 2
Click on the flip icon for close-up detail
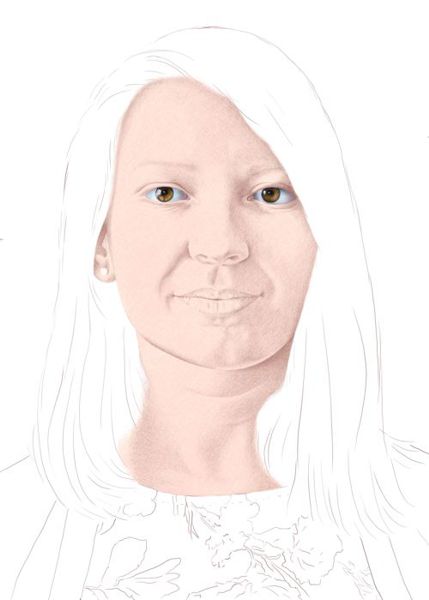
Choose a darker flesh color, perhaps a burnt sienna or burnt umber, to start building up the shaded flesh tones.
-
The main difficulty you encounter at this stage is how to pick out the darker tones as they have no obvious outlines and fade into the flesh color.
-
The technique we use is to observe our subject very closely, trying to distinguish the major areas of light and dark. Next, we start to shade these very lightly, delicately establishing what we see as the darker tones. At this point it is better to understate your shading which you will later intensify over the next few stages.
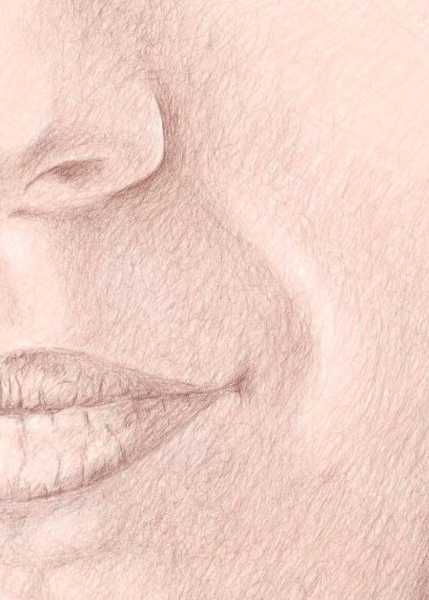
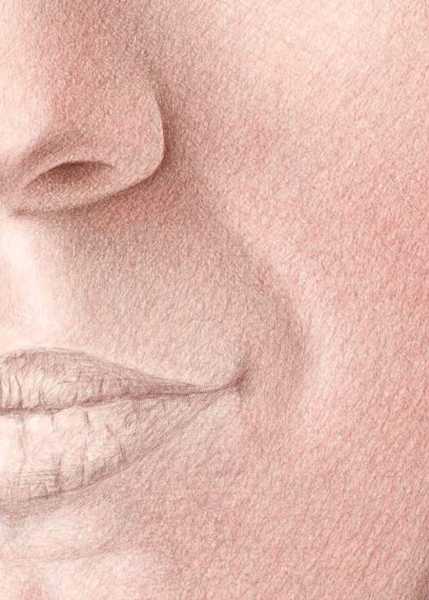
Close-up Detail
-
You can see that we have used a 'careful scribbling technique' to cautiously shade the areas of darker tone.
Shading the Skin - Step 3
Click on the flip icon for close-up detail
Once you create your initial areas of shading, you then have something you can relate to and compare against your subject.
-
Drawing is all about looking, recording what you see, and then comparing it with your subject. To do this you need to constantly ask yourself questions like, "Should my tones be darker or lighter? Should they have more gradation? Should they be warmer or cooler colors? Should they have a smoother texture?" and then respond by accepting or altering what you have done.
Close-up Detail
-
Here you can see how we have enhanced the form of the face by building upon the shading we did at the previous stage.
-
Note how our 'careful scribbling technique' both intensifies the darker tones whilst beginning to merge with the basic skin color.
Shading the Skin - Step 4

Click on the flip icon for close-up detail
In order to balance the tones of the flesh you must also focus on the lighter areas which add a natural sheen to the skin.
Close-up Detail
-
The best technique for applying light tones to the skin is by using an eraser to lift off color and expose the white of the paper below. With a little practice you will find that you can gradually subtract color from the drawing with the same degree of control that you get shading with a pencil.
-
You could also use a white color pencil but you will find that the results are nowhere near as vibrant due to the transparency of color pencils pigment which fail to cover the flesh tones beneath.
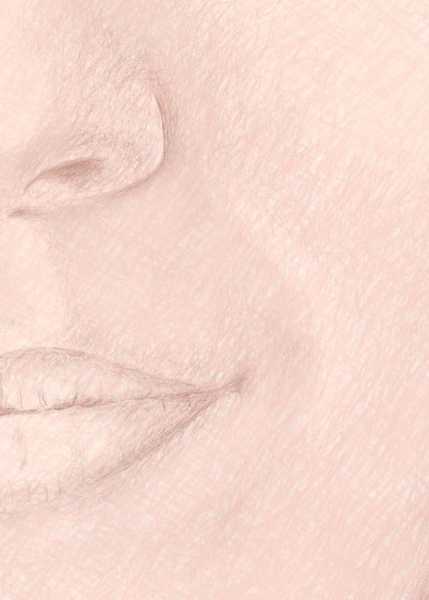
Shading the Skin - Step 5

Click on the flip icon for close-up detail
Our skin is a living organism whose color subtly changes in response to emotional and environmental factors. This is due to the movement of blood beneath its surface which temporarily alters its shades and tints.
Close-up Detail
-
In order to capture these slight shifts in color, we have applied a thin layer of red, very lightly shaded to modulate the skin tone.
-
It is subtle details of this nature, which you only begin to notice after prolonged observation, that will enhance the naturalism of your portrait.
-
Note how each layer of shading also adds to the density of the skin tone, gradually filling and refining its texture.
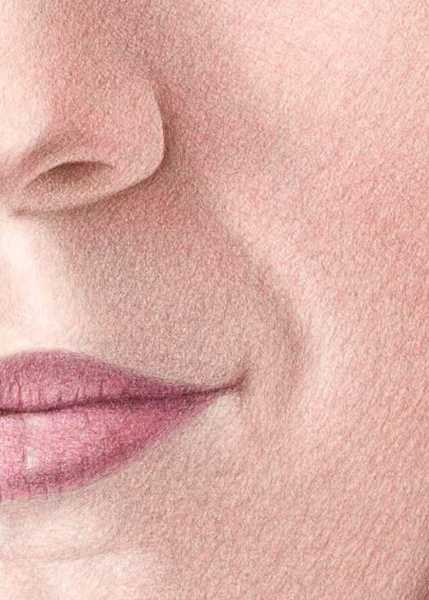
Shading the Skin - Step 6
Click on the flip icon for close-up detail
With each successive step in your drawing you heighten your knowledge and awareness of your subject's face.
-
By this stage you should have built up a good understanding of the overall color and tonal composition of their face.
-
You are now ready to increase the contrast of the darker tones to heighten the dramatic impact of the image.
-
This is simply a matter of using your darkest browns to intensify the deepest tones of the face by applying the same 'careful scribbling technique' as before.
Close-up Detail
-
At this stage you should also try to improve the quality of finish in your drawing by refining the smoothness of previous layers in order to create an even texture on the skin.
-
You do this by reusing the original colors to patiently touch up any irregularities that naturally occur in your shading technique.
Shading the Skin - Step 7

Click on the flip icon for close-up detail
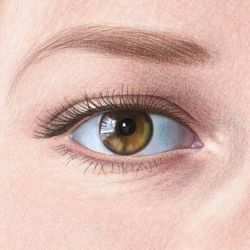
The final stage in completing our drawing of the skin with color pencils is to render the texture and color of the eyebrows, eye lashes and lips. As these steps are quite important we have dealt with them separately on the following pages:
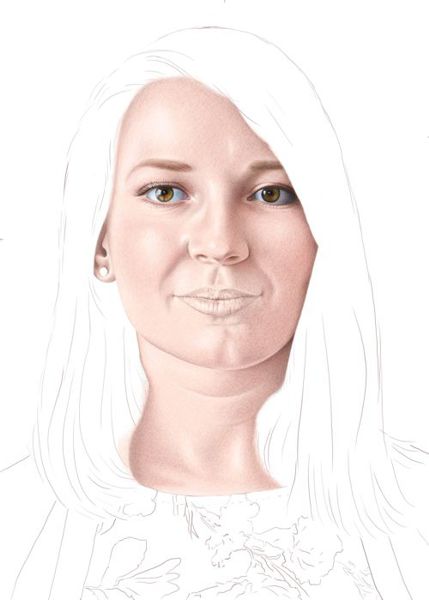
A Step by Step Summary
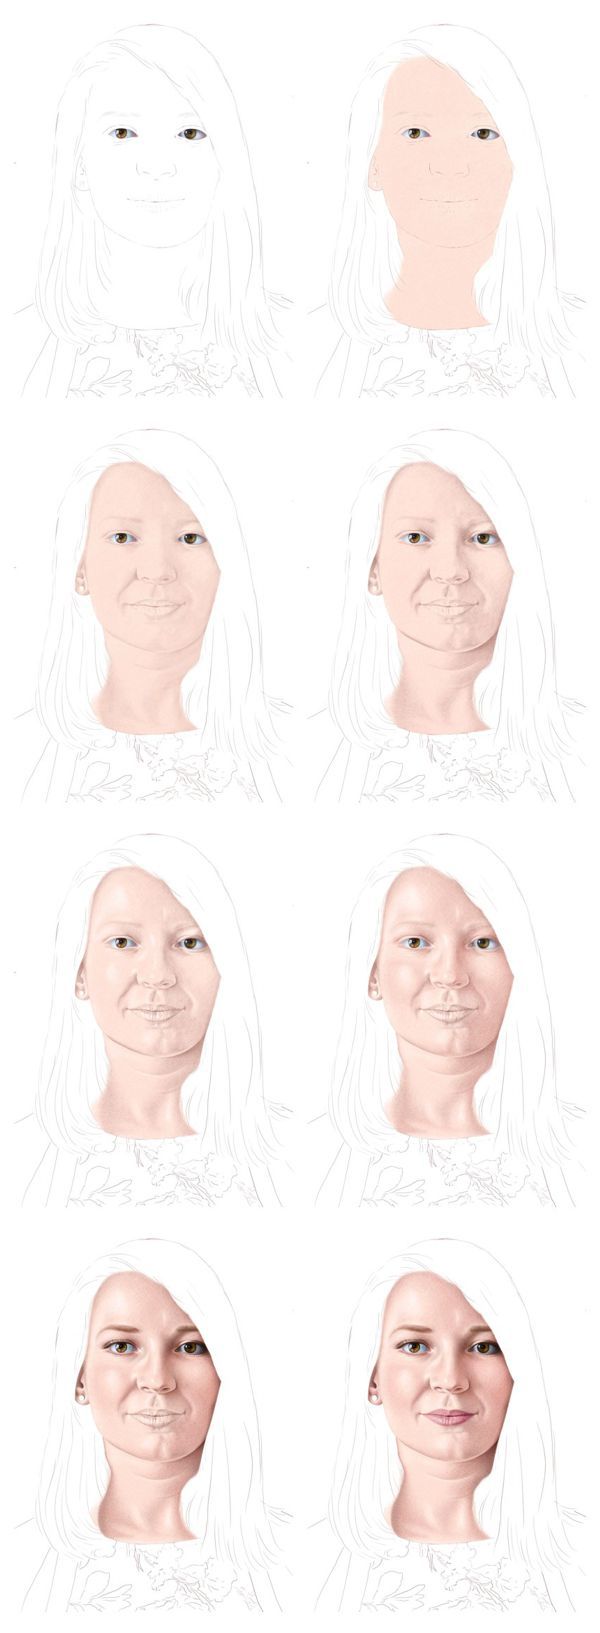
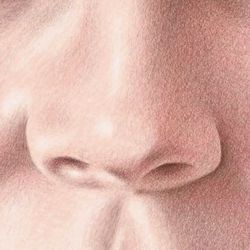
In our illustration you can see how our color pencil drawing is built up in a series of layers that gradually refine the elements of line, color, tone and texture to create a convincing impression of the skin.