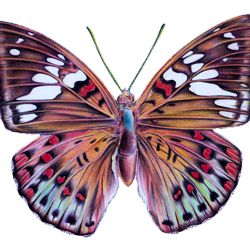
How to Draw a Butterfly with Color Pencils
This step by step art lesson demonstrates the technique used to create the color pencil drawing of a butterfly.
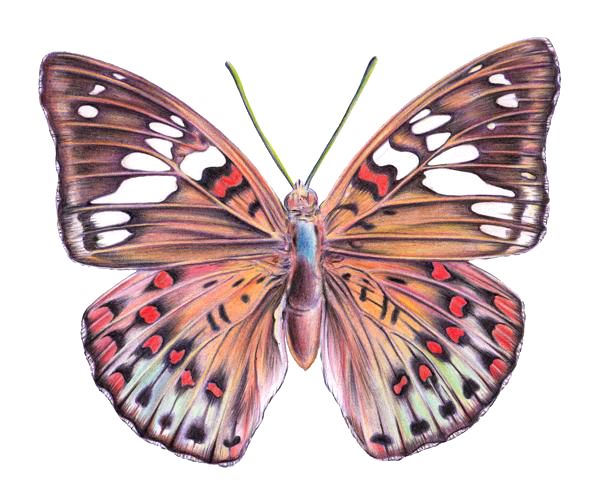
Our lesson on 'how to draw a butterfly' is a step by step demonstration of the drawing technique used for our color pencil study.
Butterflies use the patterns and colors on their wings to communicate with one another, to camouflage themselves and to ward off their predators.
Artists, designers and scientists have long been fascinated by their rich language of color which ranges from the most delicate harmonies to the dazzling contrasts of iridescent hues.
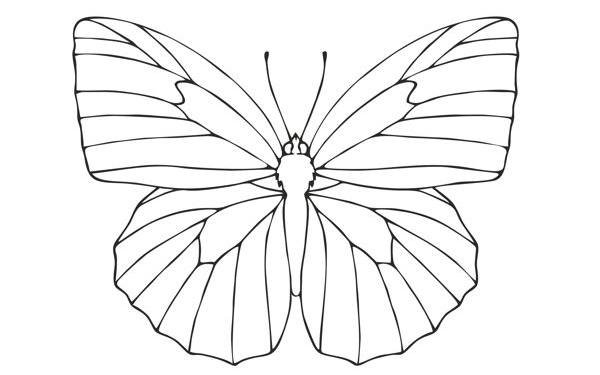
The Wing Structure of a Butterfly
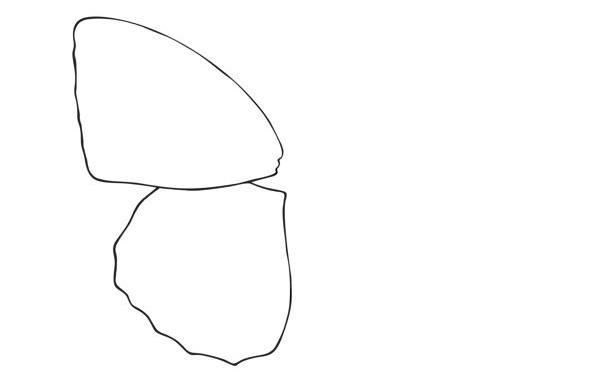
1. All butterflies have two wings on each side.
2. Their wings have a skeletal structure.
3. Start by drawing the body and two wings.
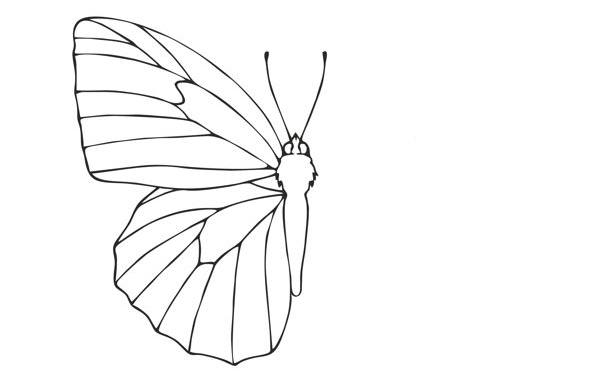
4. Trace and transfer the wings to complete the image.
It is very helpful when drawing a butterfly if you have some understanding of its wing structure before you start. This will help you to organize the complex arrangement of colours and patterns that make these creatures so beautiful.
-
Each butterfly has four wings: two forewings and two hindwings.
-
The shape of each wing is formed by a 'skeleton' of veins over which a membrane of 'skin' is stretched.
-
The structure of this skeleton varies in proportion in different butterflies.
-
The variations that you see in the shapes of butterflies correspond to variations in its skeletal proportions.
-
The arrangement of colors and patterns on butterfly wings also corresponds to its skeletal structure.
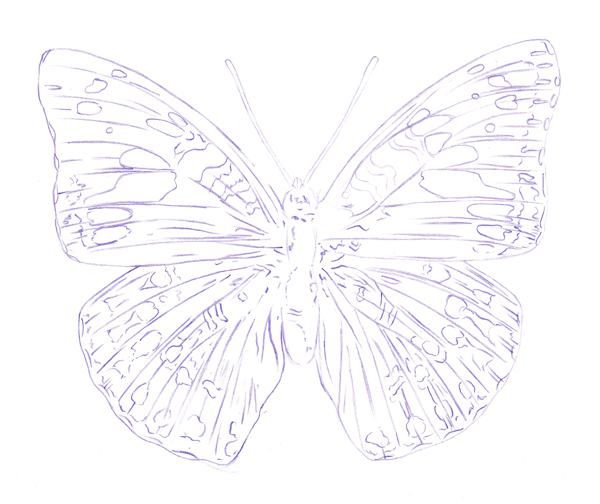
Drawing a Butterfly: Step 1
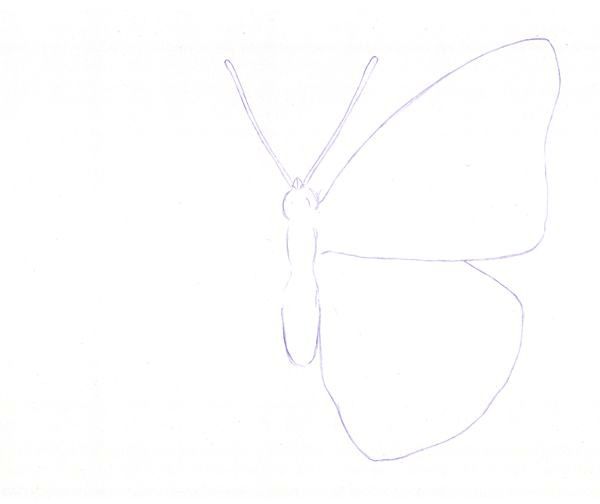
Our butterfly drawing begins with a simple line sketch of the insect's body. This has three main sections: the head and antennae; the thorax (middle section) and the abdomen (lower section).
Next draw a forewing (top) and a hindwing (bottom) paying particular attention to:
-
the difference in shape between the forewing and hindwing.
-
their proportion in relation to the size of the body.
-
the points where they attach to the side of the body.
Color pencil pigment is transparent and our butterfly drawing technique takes advantage of this quality by gradually building up the image with layers of color. Consequently the underlying sketch was begun using a purple pencil as other colours can be shaded over this without losing their vitality. If you start your underlying sketch with a graphite pencil, your colors will become soiled as you blend them.
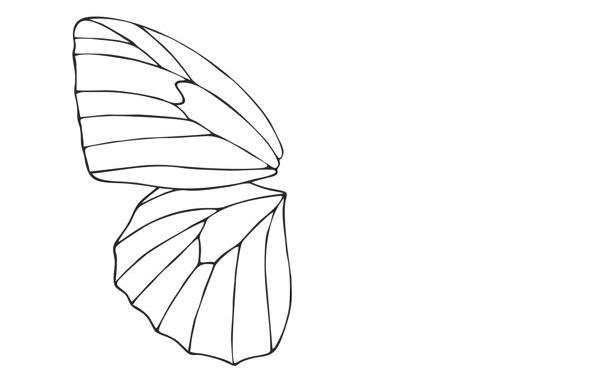
Drawing a Butterfly: Step 2
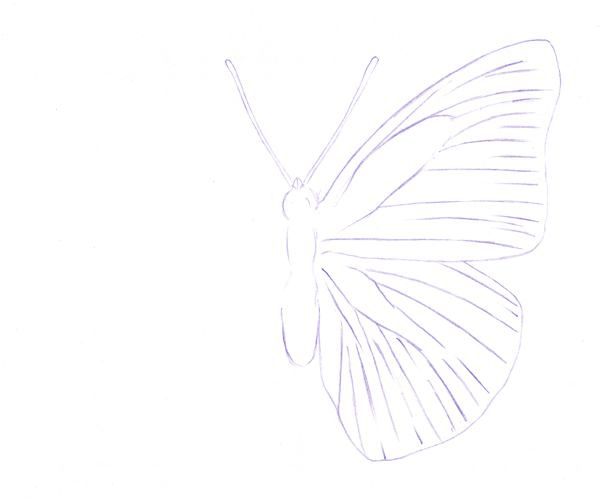
Now you should try to establish any details of the skeletal structure in the wings.
Although these lines are often difficult to see, any information of this type will help you to arrange the colours and patterns of the wing markings.
At this early stage of the drawing keep your lines as light as possible so that you can rub out any mistakes. You can erase color pencil if it is drawn lightly but it becomes more of a problem if your line is too heavy.
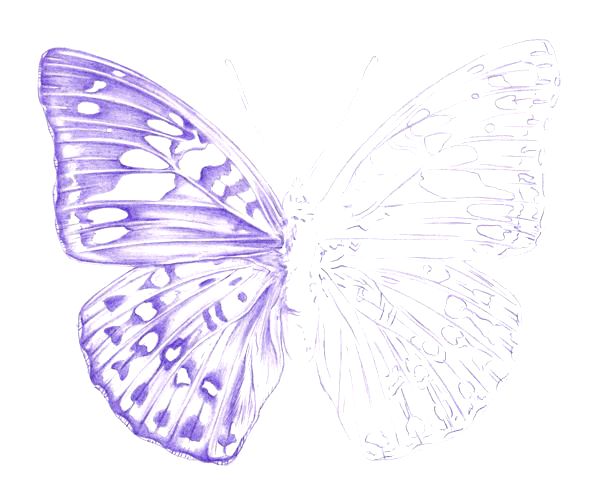
Drawing a Butterfly: Step 3
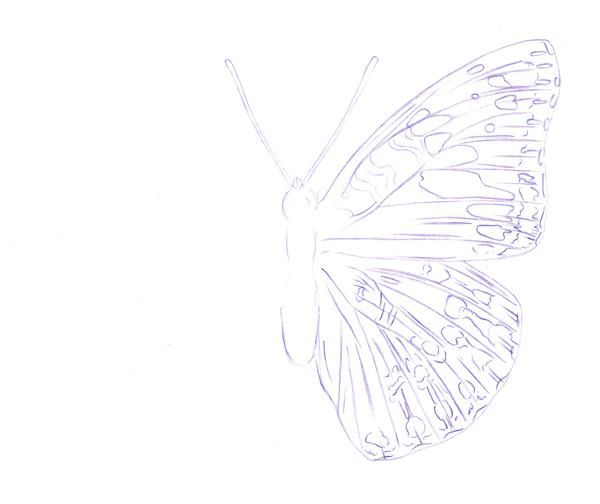
Next you can outline the colors and patterns on the wings.
If you have managed to plot some of the skeletal structure in Step 2, you will notice how the arrangement of the shapes and colors of the wing markings correspond to its sections.
Drawing a Butterfly: Step 4
Once you have completed the markings on the first two wings you are faced with a choice of drawing techniques:
Technique 1: As butterfly wings appear symmetrical, you can 'trace and transfer' the wings across to the other side of the body in order to form the second set of wings. The advantage of this technique lies not only in its speed, but also in its capacity to create a well balanced drawing, particularly if you have made the odd mistake in the first set of wings. When you trace and transfer your drawing, your so-called 'mistakes' are also duplicated. However, they are symmetrically balanced by this technique, making them look deliberate. Consequently they are less likely to be read as errors.
Technique 2: By following the same path you simply continue with your observational drawing for the second set of wings. As the wings are not exactly symmetrical this is the more difficult choice because it demands greater concentration to capture the slight variations of shape and color between each side. It is this path that we followed in this drawing as you can see by comparing the markings on each wing.
Drawing a Butterfly: Step 5
Before you apply any color you need to establish the tonal structure of the drawing.
At this stage you should continue to use the purple pencil as other colors will comfortably blend over it.
Avoid shading over any areas of light or pure color as you need the white of the paper to shine through to illuminate these vibrant areas later in the drawing.
You will notice that our artist started the shading on the left hand side of the image. This is because he is right handed and wants to work away from what he has already drawn to avoid smudging it. If you were left handed you would obviously start on the right hand side.
Drawing a Butterfly: Step 6
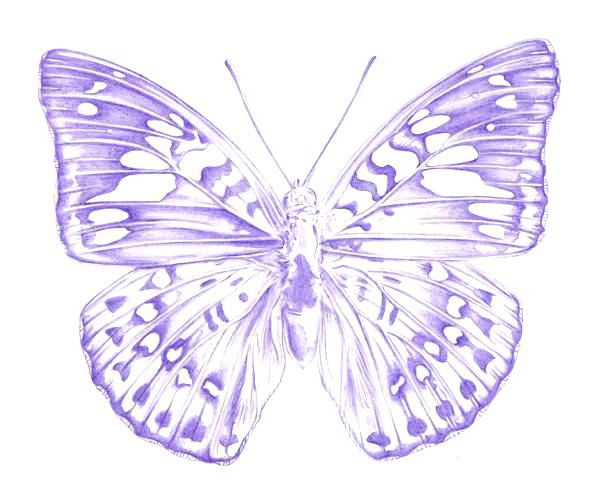
Before you apply any color you should finish the tonal study of the butterfly.
It is so tempting to apply small sections of color to see what it looks like, but you should avoid doing this because you need to gradually build up your colors in layers to achieve an overall balance. If you focus on small sections of color you may lose sight of this overall balance.
Drawing a Butterfly: Step 7
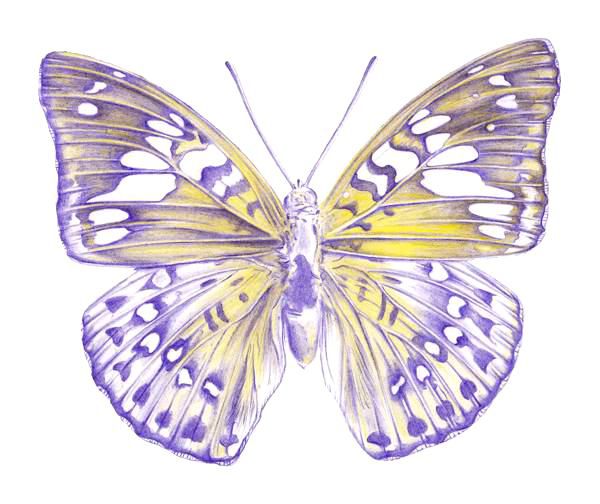
Analyze the colors you wish to create by breaking them down into their basic hues i.e. the colors you would use to mix them. Apply these in layers of pure color starting with the lightest color of the mixture.
For example, on this butterfly we wish to create a yellowish-orange that graduates to a dark brown on the forewings and pink and turquoise-blue on the hindwings. Therefore we start with a foundation of yellow that gradually fades as it changes color.
Drawing a Butterfly: Step 8
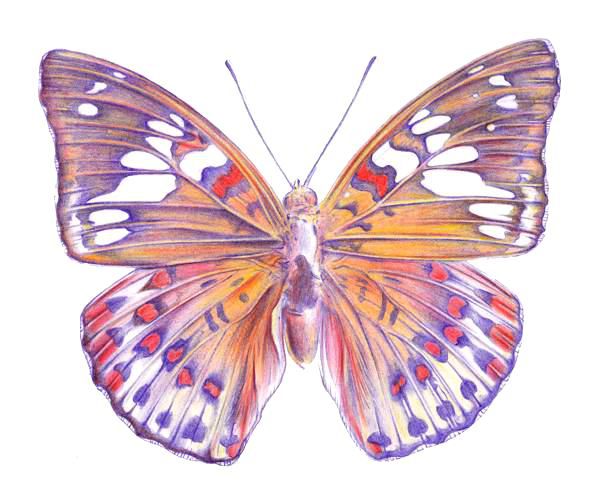
To build up the necessary depth of color we applied a layer of orange which gently changes to red on the hindwings.
Note how the transparent layers of yellow and orange blend with the purple and begin to form a brown.
We also used flat areas of pure red to create the spots and stripes on the wings.
Drawing a Butterfly: Step 9
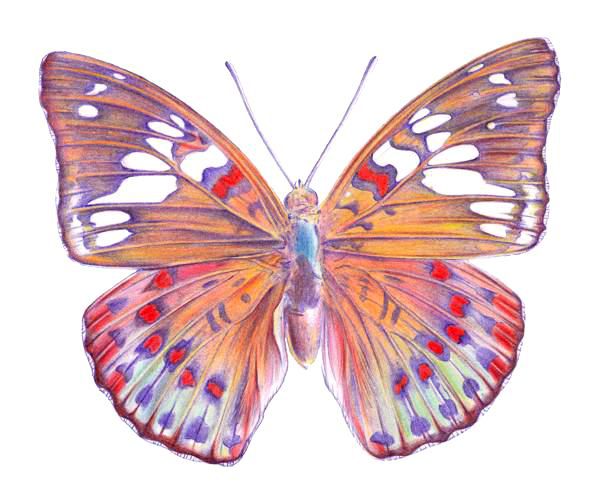
While adding another layer of orange and red to further intensify our color, we applied some light tints of turquoise blue and green for the lower sections of the hindwings.
Note: You do not add white to create tints in color pencil drawing. You create tints by shading lightly and letting the white of the paper shine through the transparent pigment.
Drawing a Butterfly: Step 10
Finally, the drawing is completed by adding the darkest colors. Brown is applied to transform the darker areas of tone which concentrate in a dense black around the skeletal form and patterns on the wings.
Note: The darkest colors should always be applied last as it is easier to control their tonal impact by slowly building them up at the end of a drawing.