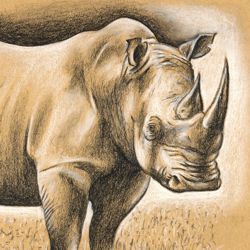
How to Draw a Rhino with Charcoal and Chalk
This step by step art lesson demonstrates the technique used to create a charcoal and chalk drawing of a rhinoceros.

Our lesson on 'how to draw a rhinoceros' is a step by step demonstration of the charcoal and chalk techniques used to create our rhino drawing. Charcoal and chalk is the ideal medium for drawing creatures like rhinos and elephants whose dramatic form is more powerful than their color.
Drawing a Rhinoceros: Step 1
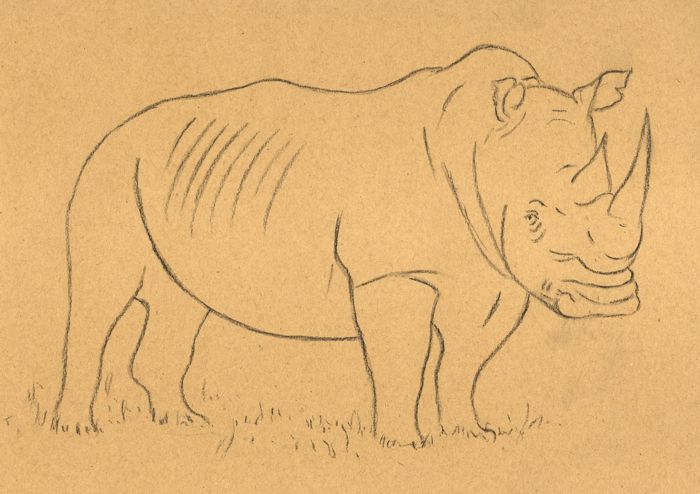
The first step in this drawing is to concentrate on rendering the basic shapes of the rhino in line only. At this stage you can also add some details such as wrinkles and rolls of skin and begin to suggest the foreground.
Note: When using charcoal and chalk, you should choose a mid-toned paper. This will allow you to use the charcoal for your dark tones, the chalk for your light tones, and the color of the paper for your mid-tones.
Drawing a Rhinoceros: Step 2
The second step in this drawing is to lay down the dark tones in order to establish the form of the rhino. You must start by setting the subject's light source which, in this case, shines from the left and above our rhino. You then apply shading to those areas that are hidden from the light source, mostly on the right and below our rhino. Always start your shading very lightly and then gradually darken its tone, building its intensity towards the areas that are hidden from the light source.
Note: When drawing with charcoal you should use both charcoal sticks and a charcoal pencil. The sticks are softer and more suitable for broad smudging effects, while the pencils are harder and better for accurate detail.
Drawing a Rhinoceros: Step 3

The third step in this drawing is to establish the light tones. The areas that directly face the light source have the brightest tones. You therefore apply the brightest white to these areas and gradually reduce its strength as the surface curves away from the light source. Small stokes of white chalk are used to highlight the texture of the skin and the grass in the foreground.
Note: When applying the light tones, you can use either blackboard chalk or white pastel pencils. The chalk is better for applying to large areas while the pencils are good for small details. You can buy pastel pencils individually or in sets. Alternatively, blackboard chalk can be sharpened to a point with a wide pencil sharpener for the execution of fine details.
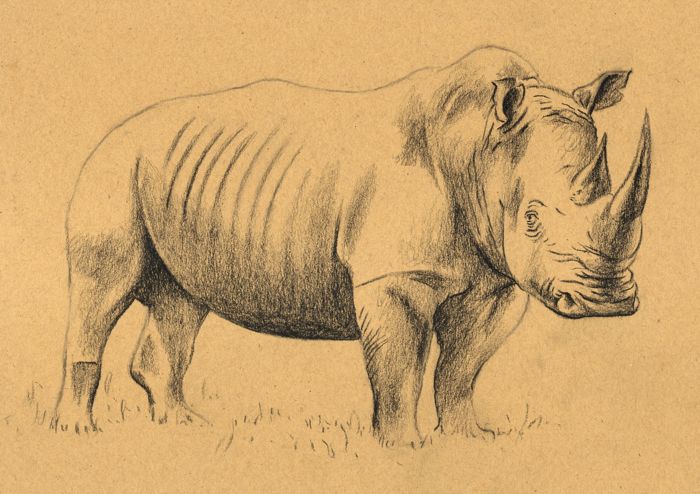
Drawing a Rhinoceros: Step 4
The final steps in this drawing are to establish the tones of the background and unify the overall tones of the image. The purpose of the background is to increase the expressive power of the drawing by creating a dramatic contrast with the animal. This is done by placing dark background tones to highlight the light areas of the rhino and conversely light background tones to contrast with its shaded areas. The overall tones of the image are finally balanced by heightening the darkest and lightest areas to fine tune the dramatic impact of the image. Finally, the texture and tone of the grass strengthened to provide a solid base.
Note: The secret of creating any good charcoal and chalk drawing lies in the way you balance the dark and light tones. Both dark and light tones should be applied so that they leave some of the neutral tone of the paper to do the work of the mid-tones.
Albrecht Dürer's Rhinoceros
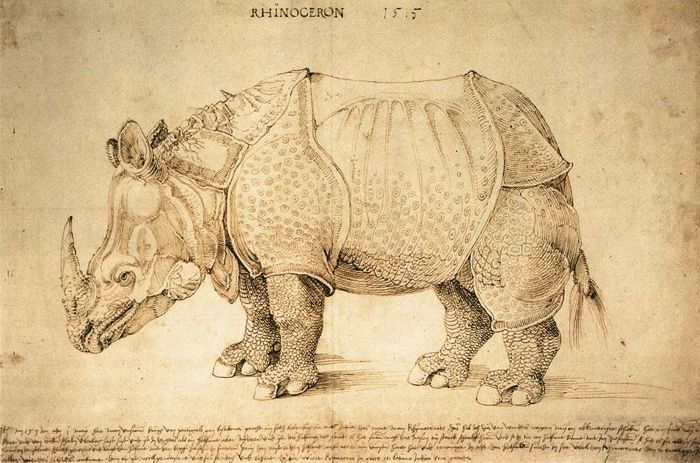
ALBRECHT DÜRER (1471-1528)
'Rhinoceros' 1515 (pen and ink)
Check out this early 16th century drawing of a rhinoceros by Albrecht Dürer.