Repeat Patterns Lesson 2
This lesson teaches you how to design a repeat pattern by using a template to construct shapes and colors drawn from your imagination.
There are so many options open to you when you are designing a repeat pattern from your imagination that the choice can be overwhelming. Consequently, it is helpful to start with a template that uses fixed points to link the flow of the design from one repeat unit to the next.
Our lesson is divided up into 3 sections:
-
Drawing the template.
-
Coloring your design
-
Constructing your repeat pattern.
Part 1 - Drawing the Template
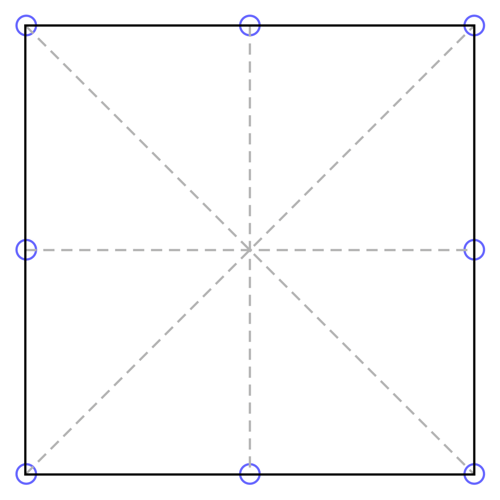
Start by drawing a square.
-
Draw the diagonals.
-
Divide the square into four smaller squares by drawing a horizontal and vertical line through the middle.
-
The key points (blue circles) are created where the horizontal, vertical and diagonal lines meet the outline of the square.
-
Alternatively, you can download a blank template to print and use.
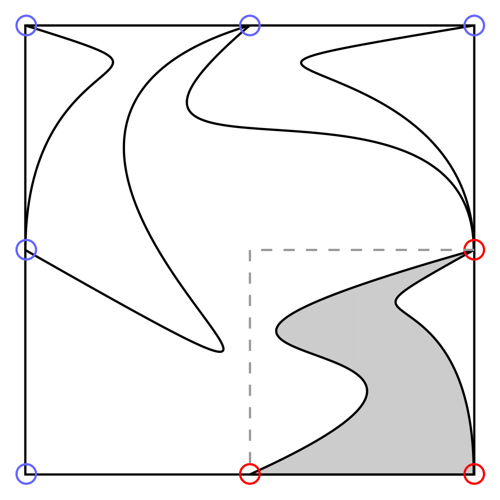
Step 1 - The first shape of the background layer.
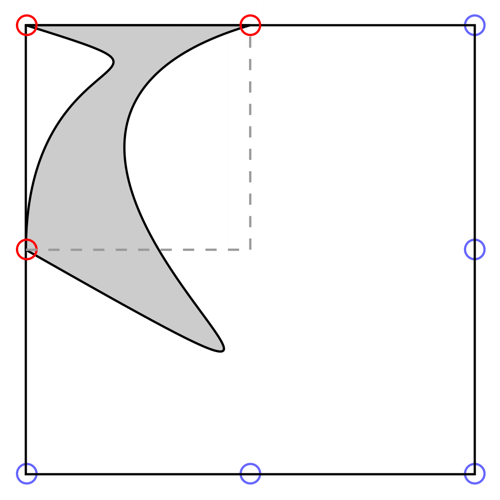
The first shape on our background layer is a combination of gentle organic curves that fill the top left quarter of our design.
-
There are several points to bear in mind that may help you when you are drawing your shapes:
-
Start to draw your shapes in the corners of the unit making sure that they touch the adjacent key points (red circles). These are the points of connection between the 'repeat units' which link the pattern together.
-
Try to balance your shapes with the space that surrounds them so that both become equally active in the design.
-
Your shapes do not have to fit exactly into each quarter of the square. The suggestion of using quarters is simply a device to help you balance your shapes in the overall design.
Step 2 - The second shape of the background layer.
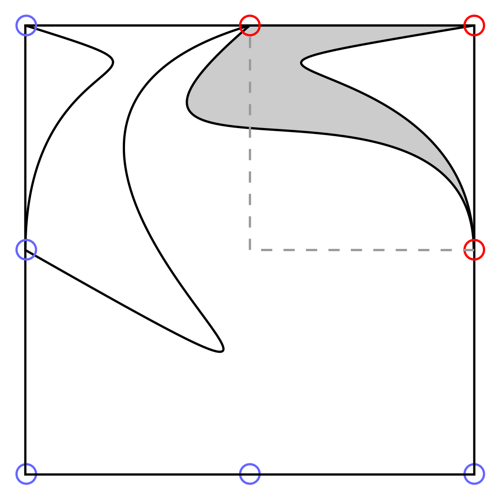
Our second background shape fills the top right quarter of the design.
-
The curves that we have used for this shape are in harmony with our first shape and initiate a visual interplay between them.
Step 3 - The third shape of the background layer.
Our third background shape fills the bottom right quarter of the design.
-
This shape continues the interaction of curves and builds on their relationship.
Step 4 - The fourth shape of the background layer.
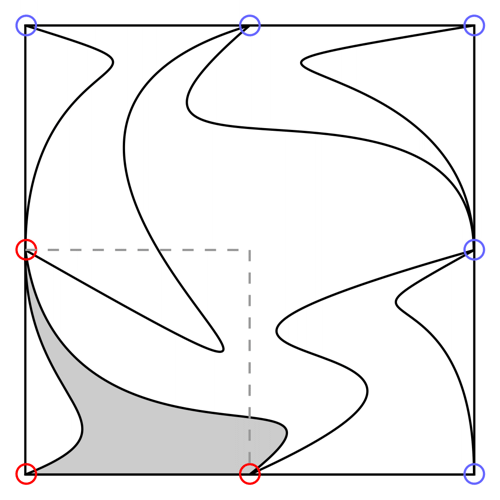
Our fourth and final background shape fills the bottom left quarter of the design.
-
This balances the interplay of curved forms and leads us in a clockwise direction back to the first shape.
Step 5 - The first shape of the foreground layer.
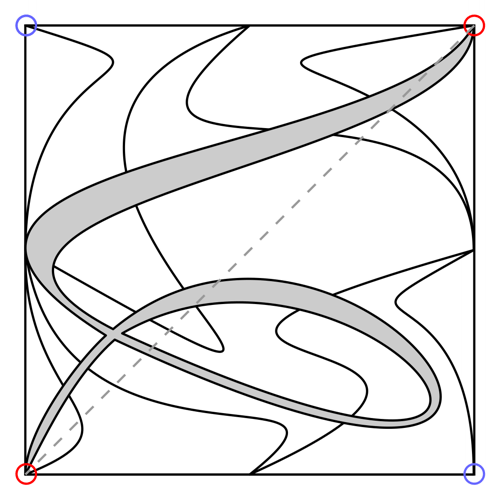
The foreground layer of shapes in our design is necessary to enhance the spatial depth of the image and to augment the interaction of curves.
-
The first of our foreground shapes is a vigorous whiplash curve that travels down one diagonal (red circles) of the unit.
-
Its speed is conveyed by the variations in its thickness and direction. The path that it follows is also calculated to break up the shapes and spaces of the background in as interactive a way as possible.
Step 6 - The second shape of the foreground layer.

Our second foreground shape is a similar whiplash curve that travels down the other diagonal (red circles).
-
This also interacts with the shapes and spaces of the background but adds some necessary contrast to the sinuous curves with a couple of sharp angular twists.
Step 7 - The completed drawing
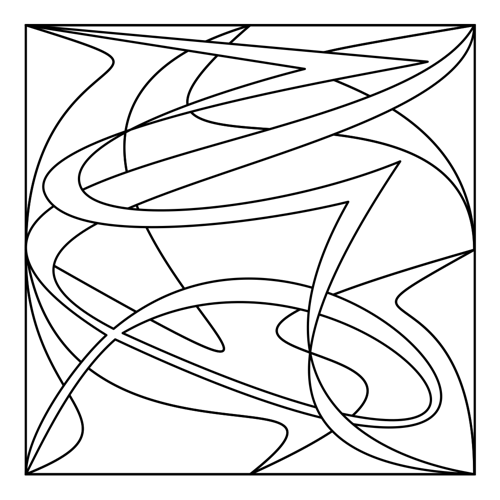
Once you have finalized the shapes for your 'repeat unit' you are now ready to apply color and tone to enhance the mood and depth of your design.
Part 2 - Coloring your Design
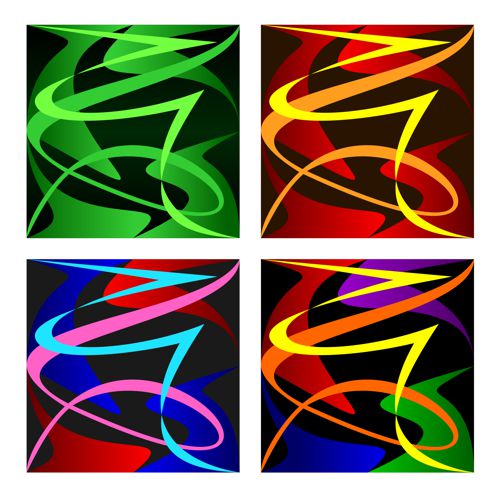
Trace and transfer your 'repeat unit' onto an sheet of paper to form a layout similar to our illustration. You can then explore the different effects of tone and color on your design until you begin to discover certain combinations that appeal to you more than others. Click here for a blank template of our development sheet that you may print and use.
'Trace and transfer' technique: Take the tracing of your unit and draw carefully over the design on the back of your tracing paper so that you have the same image pencilled on both sides. Now place your tracing onto a sheet of paper and draw heavily over the lines of your design to transfer the image. Use a soft grade pencil (grade B or 2B) as this will transfer more easily.
Select your best color arrangement.
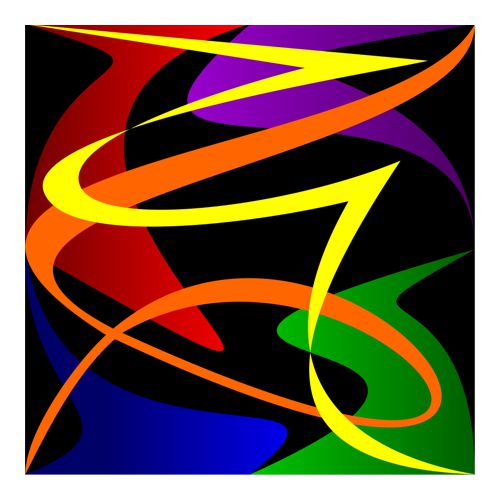
Finally, select one design from your development sheet that appeals to you more than the others.
-
This will become the 'repeat unit' that you use to construct your finished pattern.
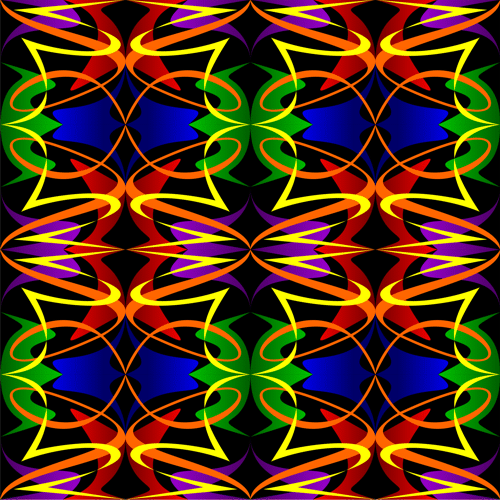
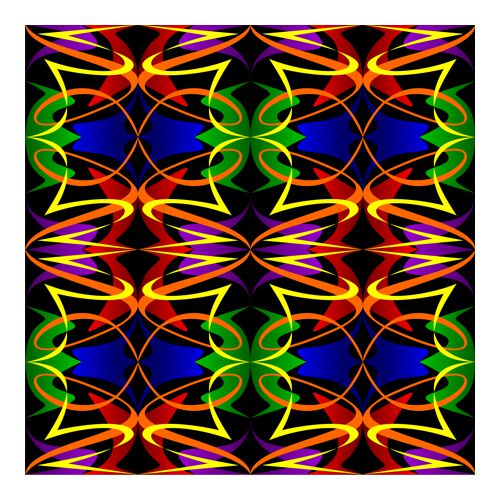
Four Unit Repeat Patterns
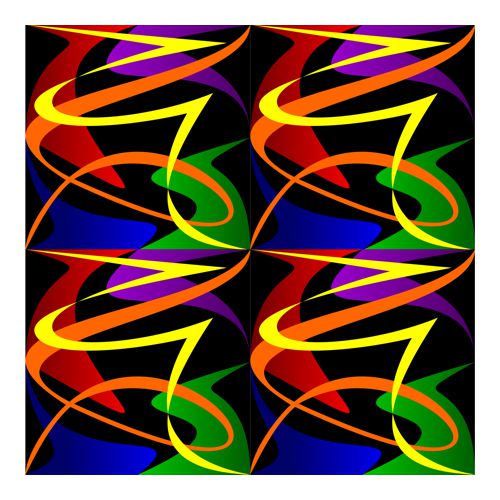
A straight repeat - where all four repeat units are arranged to face in the same direction.
-
Building a repeat pattern using a template offers you more possibilities than the 'mirror' repeat technique outlined in our previous lesson. When arranging a layout, the key points in the template will link the design whatever way you rotate the unit.
![]()
A rotational repeat - where each unit is rotated 90° in a clockwork direction.
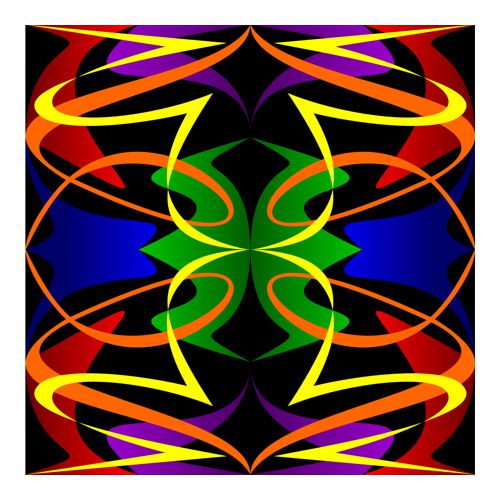
A mirror repeat - where each unit is flipped to mirror the adjacent unit.
-
You can find out more about the advantages of 'mirror' repeat patterns in our previous lesson.
Developing your repeat pattern.
Once you decide on a four unit pattern, you will find that you can repeat it continuously to form the type of pattern suitable for a wallpaper or textile design.