Pen and Ink Drawing Lessons - Materials and Techniques
This page outlines all the art materials that you need for our lessons on pen and ink drawing with Indian ink and watercolors.
Pen and Ink Drawing Materials
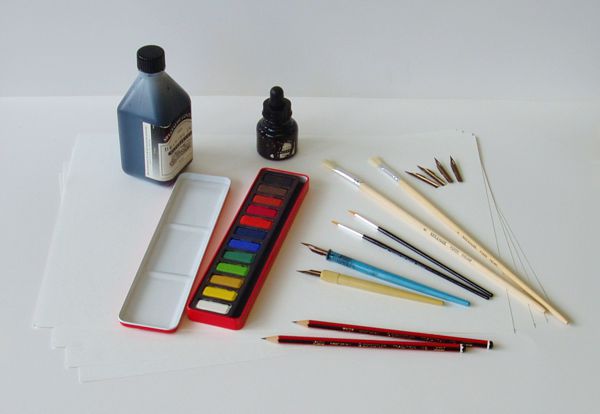
All the materials that you need to create a pen, ink and wash drawing are listed below:
Indian Ink :
Indian Ink is a type of ink that is waterproof when dry. It is supplied in bottles of various sizes and and a wide range of colors. The small bottle illustrated is the most suitable for using at a desk. It also contains a 'dropper' which is ideal for mixing an ink wash.
Nibbed Pen :
Nibbed Pens (or Dip Pens) are necessary for drawing in Indian ink as fountain or cartridge pens clog as the ink dries. A nibbed pen, which is easily rinsed clean after use, comes in two detachable parts - the nib and its handle. They are sensitive drawing tools whose quality of line responds to the hand pressure you exert.
Watercolors:
Watercolor paint comes in pans and tubes. Pans are usually the most convenient for smaller work like our ink drawing, whereas tubes are more suitable for working on a larger scale. Watercolors also come in different qualities of pigment, the strongest and most light fast colors being the most expensive. You may also use colored inks or dyes for these drawing lessons. Although they are more transparent and brighter in color, they are usually less light fast.
Brushes:
You can use almost any brush for watercolor, but the most versatile are soft sable hair or good quality synthetic brushes. It is best to invest in a good brush which will retain its character and quality over time.
Pencils:
Choose any pencil that you can easily erase without leaving a mark. Ink drawings are often done on top of a preliminary pencil sketch which is later erased.
Paper:
In our experience, it is better to use a smooth paper of 180 gms or more. If you use a lighter weight of paper, you should stretch it to prevent it from buckling when wet. A good cartridge paper is very satisfactory, but it will yellow over time. If that is a problem, it is best to use a smooth HP (hot pressed) watercolor paper with a neutral PH.
Cross Hatching Techniques

VINCENT VAN GOGH (1853-1890)
'Fountain at St. Remy', 1889 (ink on paper)
Hatching is an ink drawing technique where you apply tone and texture in rows of parallel lines.
Cross- hatching is where you crisscross several layers of hatching in order to darken your tones.
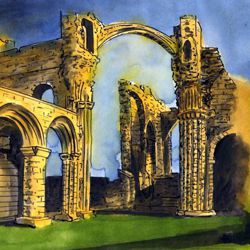
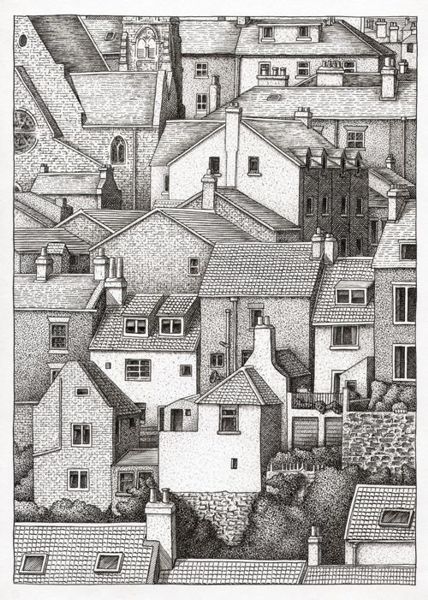
Cross Hatching can take many forms. It can be done freehand with carefully drawn lines, as in our pen and ink drawing of Whitby, or more expressively, as in Van Gogh's 'Fountain in the Garden of the Hospital, St Remy'. It may also be done mechanically with a ruler or you may even combine both approaches in one technique. Whatever method of hatching you adopt, it should be sympathetic to the subject of your work. For example, Van Gogh's drawing, which captures the overgrown garden in spontaneous energetic strokes, would look inappropriate if it was executed using a sterile mechanical technique.
Cross Hatching Worksheets
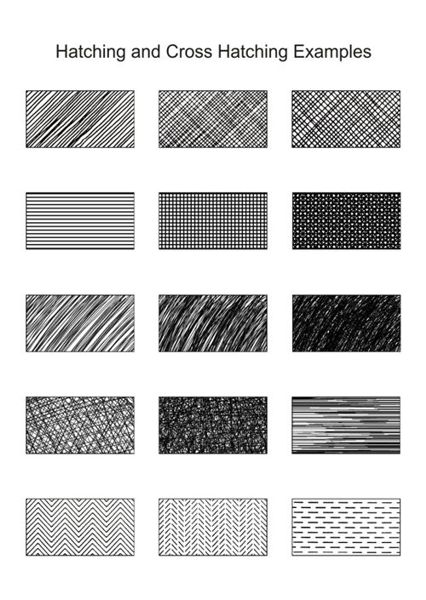
Hatching and Cross-Hatching Examples
Download this worksheet.
To illustrate different examples of hatching and cross-hatching we have created a worksheet that displays a full range of techniques from rigid mechanical renderings to expressive freehand styles.
Cross Hatching Worksheet.
Download this worksheet.
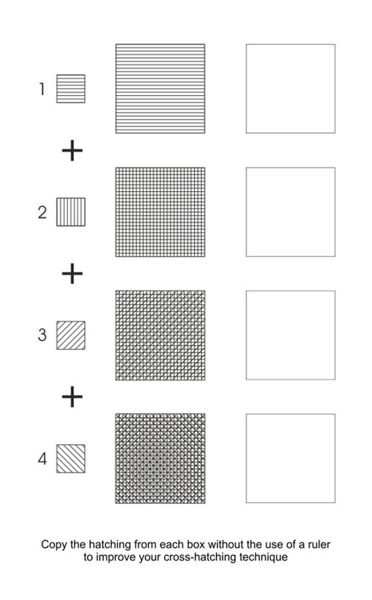
It is important to practice cross hatching before you start an ink drawing as you need to develop a confidence and rhythm to your technique. To help you practice this we have devised a cross hatching worksheet that you can use to improve your technique.
Hatched lines should be drawn lightly and closely together. When you begin you should set your paper at an angle to find a comfortable position for drawing. Change the angle of the paper (and not your body position) when applying further layers of cross hatching. A comfortable and fixed drawing position is the key to consistent cross hatching.
Stippling Techniques
VINCENT VAN GOGH (1853-1890)
'View of Arles', 1888 (ink on paper)
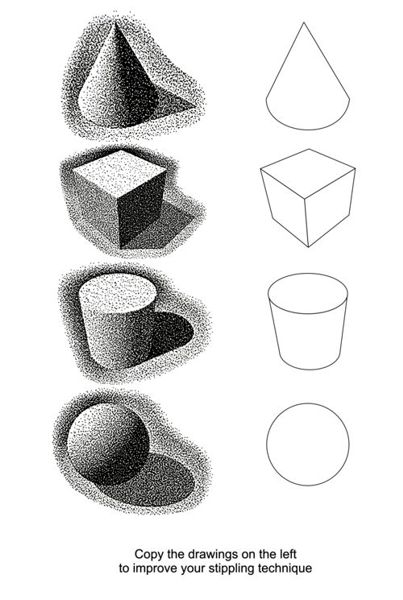
Stippling is an ink drawing technique where you apply tone and texture in small dots. You can adjust the depth of tone and the roughness of texture by varying the density and distribution of the dots.
In Van Gogh's 'View of Arles', stippling is used in a more expressive manner to suggest the natural texture of a wheat field. With the exception of Pointillism - a style of painting where form is constructed from colored dots - stippling is seldom used as a technique on its own. It is nearly always combined with cross-hatching in order to enhance its effect.
Stippling Worksheets
Stippling Example Worksheet.
Download an A4 version of this worksheet.
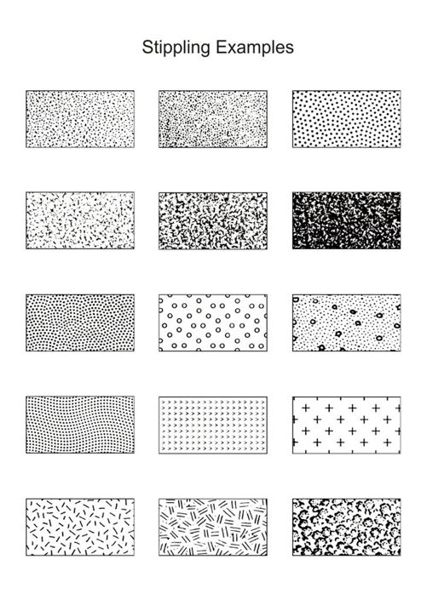
To illustrate different examples of stippling we have created a worksheet that displays a full range of techniques from rigid mechanical renderings to expressive freehand styles.
Stippling Worksheet.
Download an A4 version of this worksheet.
Combining Cross Hatching and Stippling
Creating tone and texture with cross-hatching and stippling
Cross Hatching and Stippling are the two basic techniques for the creation of tone and texture in an ink drawing. These are traditional techniques that have been used by artists for centuries. They can be applied in a tightly controlled manner, as in our drawing of Whitby, or more freely and expressively as in the Van Gogh landscape.
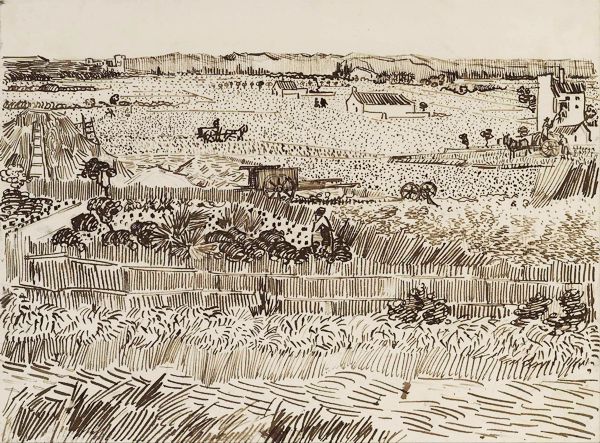
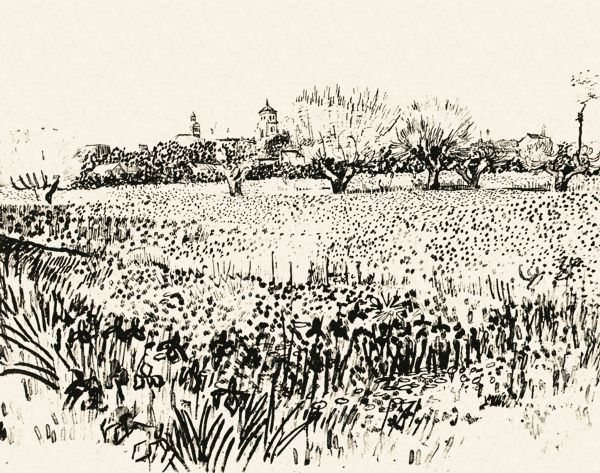
VINCENT VAN GOGH (1853-1890)
'Harvest Landscape', 1888 (ink on paper)
In 'Harvest Landscape', Van Gogh intuitively combines hatching and stippling to create a bold expressive technique that naturally conveys the depth, texture and energy of its subject. The spontaneity and fluidity of his pen strokes say as much about the artist's personality as they do about the subject. It is the skill of an artist's technique, filtered though a personal vision of the subject, that determines the quality of an artwork.
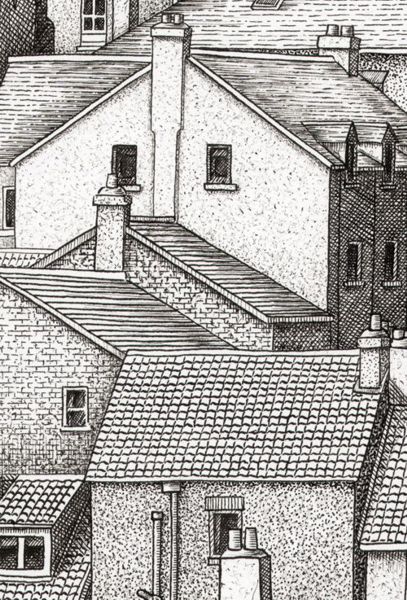
Detail 1
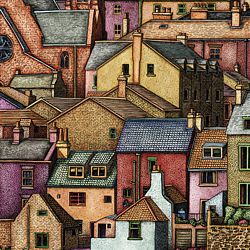
If we look at a close-up detail of our Whitby drawing, it should help to reveal how cross hatching and stippling are combined for a tonal and textural effect. A range of cross hatching and stippling techniques have been used to give tone and texture to the walls and roofs. These techniques are not used independently from one another, but are combined to increase their effectiveness. After the brickwork and roof tile patterns had been sketched in, areas of tone were hatched and cross hatched over these to suggest depth and form. Stippling was then applied in various densities to both plain and brick patterned walls in order to convey the grime and texture of the different surfaces.
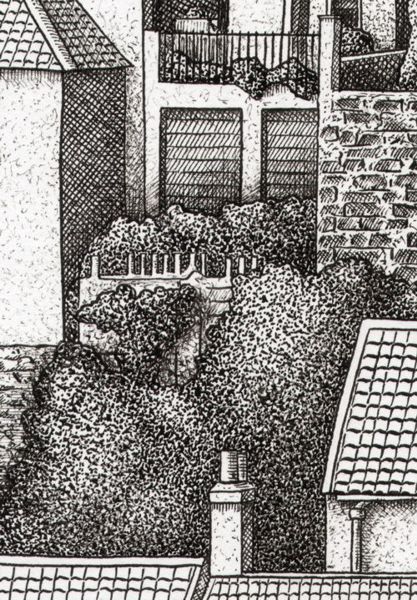
Whitby Detail 2
In Detail 2, graduating densities of stippling have been used to express the texture of the bushes. Hatching and cross hatching, combined with stippling, have been applied to suggest a variety of other surface qualities ranging from metal lock-up doors, to smooth concrete and rough brickwork.
As a general rule, it is probably easier to apply cross hatching first, in order to build up the tonal structure of the drawing. Stippling tends to be used later to add subtlety and texture to the work.