How to Draw a Tropical Fish with Pastels
This step by step art lesson demonstrates the technique used to create a pastel drawing of a tropical fish.
Our lesson on 'how to draw a tropical fish' is a step by step demonstration of the pastel drawing techniques used to create our drawing.
-
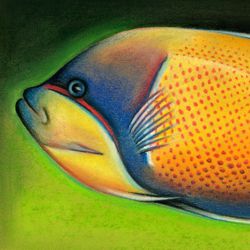
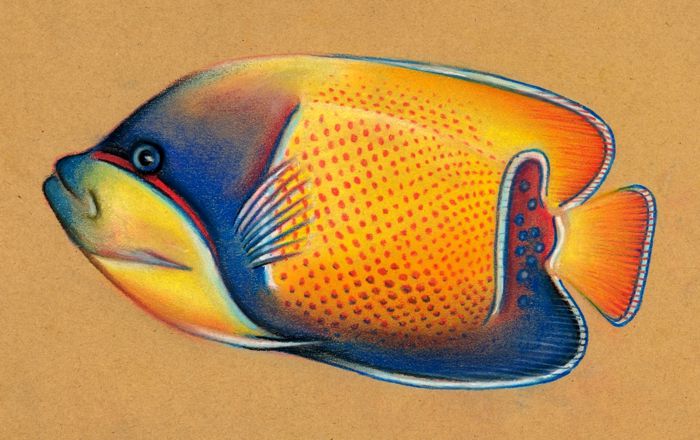
The subject we have chosen is a Majestic Angel (Euxiphipops navarchus) from Australasia.
-
The bold primary colors and patterns on the fish make this a good subject to display the qualities of chalk pastels.
Materials: The cheapest chalk pastels tend to be harder with weaker color and the more expensive tend to be softer with stronger color. However, both types have their strengths and weaknesses as a medium and it is ideal if you have both to choose from. Pastels also come in pencil form which is best for applying fine details.
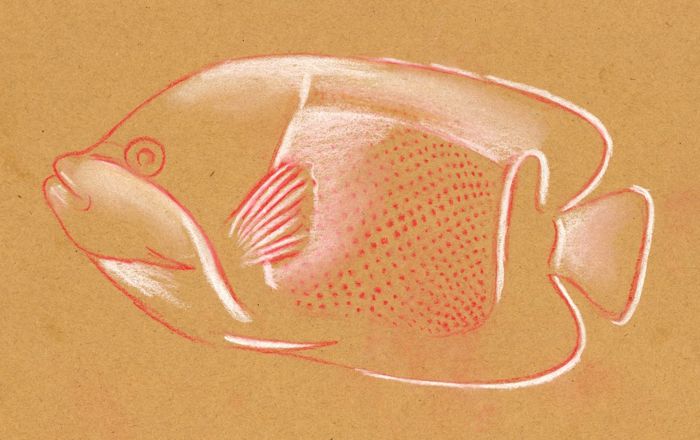
Drawing a Tropical Fish: Step 1
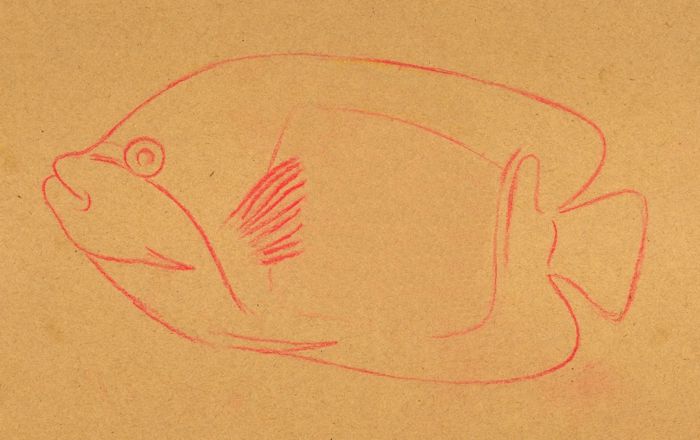
The first step in our tropical fish drawing is to concentrate on rendering the line, shape and proportions of the image. A red crayon was chosen for the line drawing because it is a color that appears throughout the fish. Never use black to draw the image as it would contaminate any colors that are applied over it. As black pastels contain very strong pigments, it is a good policy to limit their use to the final stages of a work.
Note: When using pastels you should choose a mid-toned paper. This immediately establishes a neutral background which helps you to balance the relationships between light and dark colors and tones.
Drawing a Tropical Fish: Step 2
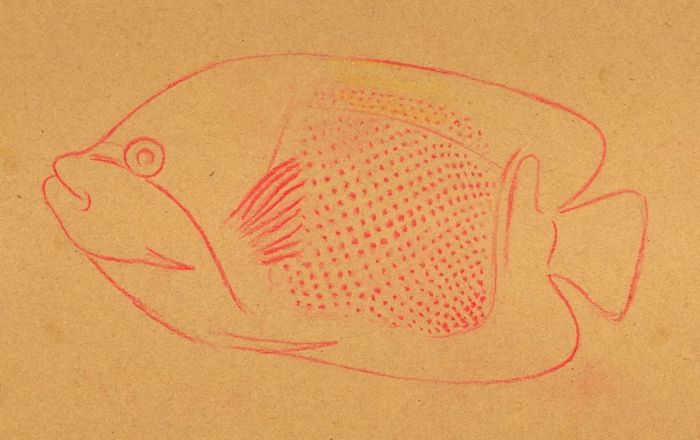
The second step in this drawing is to establish the complex pattern of dots on the skin of the fish. When you finish these details, spray the drawing with fixative (hair spray is a good alternative) to stabilise the image and stop it smudging when you later apply the tones and colors.
Note: It is simpler to tackle complicated details at this early stage because you can easily erase your mistakes. At a later stage, the image will be covered in chalk which makes adjustments more difficult.
Drawing a Tropical Fish: Step 3
The third step in this drawing is to sketch in the lightest tones.
Note: White was applied to some areas of the fish and softly smudged to create a gradual change of light. You can blend chalk pastels by smudging with your fingers to graduate the shading of tones and colors. Alternatively, you can use a tortillon (blending stump) which is like cardboard crayon that can be sharpened to a point.
Drawing a Tropical Fish: Step 4
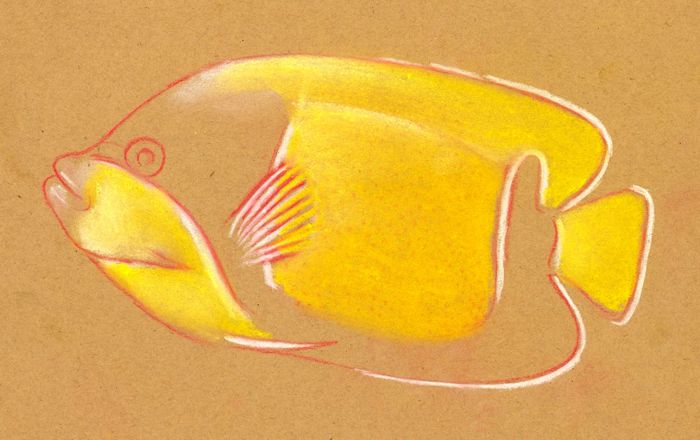
The fourth step in this drawing is to build up the lightest colors. Yellow is softly blended into the white and begins to reveal the main tone, color and pattern of the fish.
Note: When working with chalks which naturally smudge, it is best to apply the lightest colors first and work gradually towards the darkest. You can work more freely with light colors as they are easy to change and erase. You have to be more careful using dark colors whose pigments stain more deeply and are difficult to adjust. These properties, however, can also be used to your advantage. Note how the light yellow chalk covers the dark red dot pattern applied earlier. If you look very closely, you will see that there is just enough of the darker dot pattern shining through the lighter yellow to enable you to re-establish the design at a later stage.
Drawing a Tropical Fish: Step 5
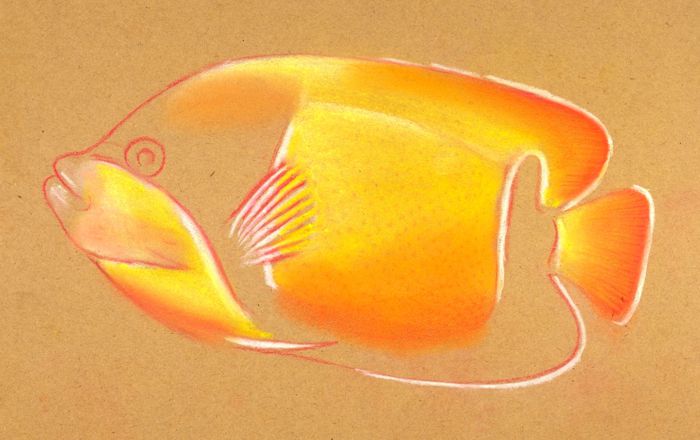
The fifth step in our tropical fish drawing is to blend in the medium toned colors. Scarlet red naturally changes to orange as it blends into the yellow.
Note: Colors, such as red and yellow that are adjacent to one another on the color wheel blend smoothly, whereas the transition between colors, such as red and green which are opposite one another is far less comfortable.
Drawing a Tropical Fish: Step 6
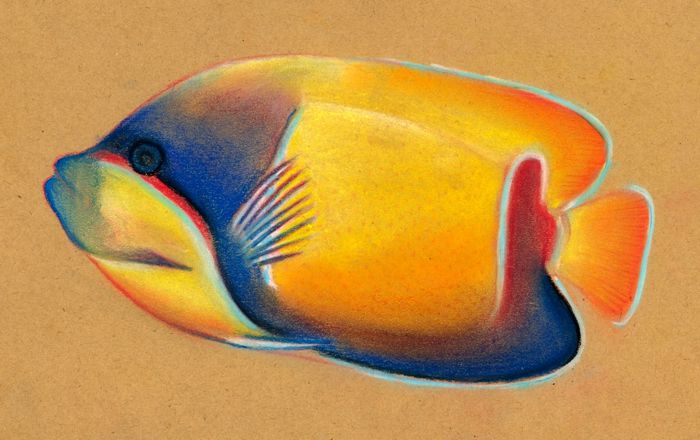
The sixth step in this drawing is to blend in the darker colors: crimson, blue and black.
Note: The main danger in using dark colors is that you blend them excessively into the lighter areas, thereby destroying the luminosity of the image. The trick here is to work cautiously, starting with crimson as the lightest color, followed by the blue and finishing with the black. The white edges to the fins, which seemed too bright after the dark colors were added, were partly subdued with a pale blue.
Drawing a Tropical Fish: Step 7
The penultimate step in our drawing is to add the finer details to the fish and to re-establish those that have been covered over in the process of the work.
Note:There are several techniques you can use to help you apply fine details. The cheapest pastels, which are usually hard, can be sharpened to a point with a wide pencil sharpener. This technique was used to re-establish the red dot pattern. You can also sand pastels down to a chiseled edge with sandpaper to enable you to draw fine lines. This technique was used for the fins. Alternatively, pastel pencils, which you can purchase individually or in sets, could do both of these jobs.
Drawing a Tropical Fish: Step 8
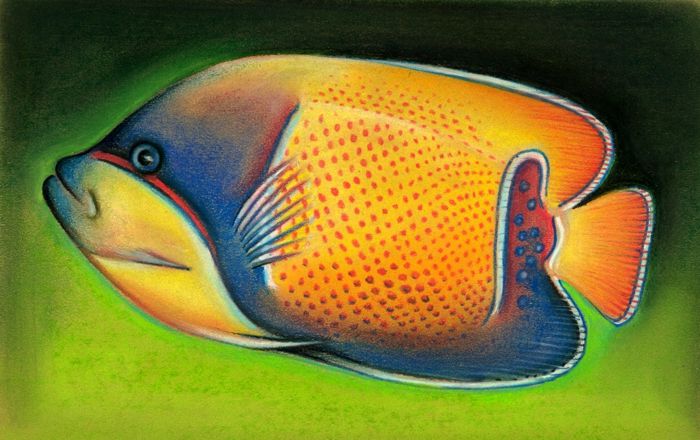
The final step in our drawing of a tropical fish is to create a background that complements the image.
Note: Green was chosen as the general background color as it harmonizes with the main colors of the fish. The tone of the background was graduated to create a dramatic counterchange with the image - light tones to contrast with the dark edges of the fish and dark tones to contrast with the light edges.